|
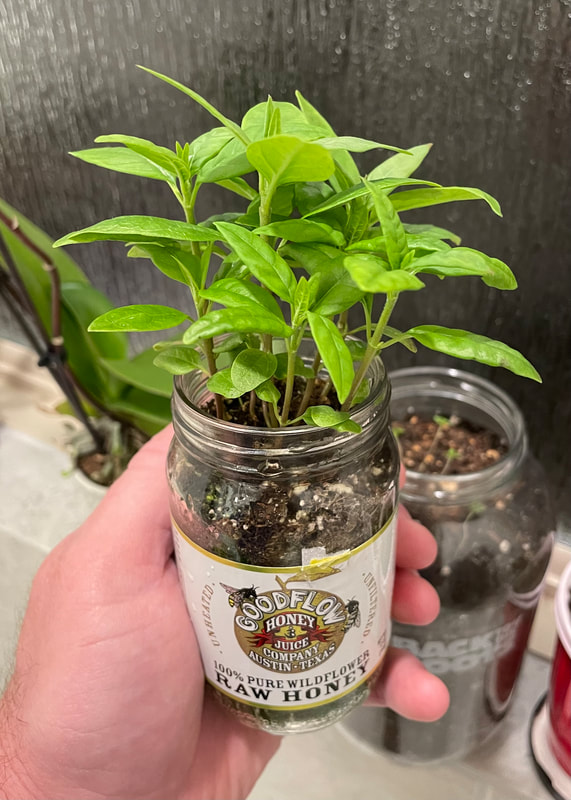
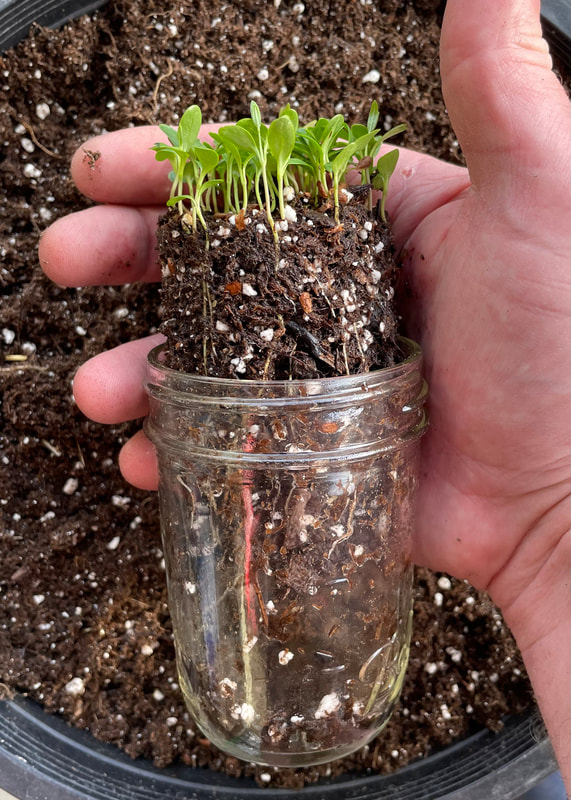
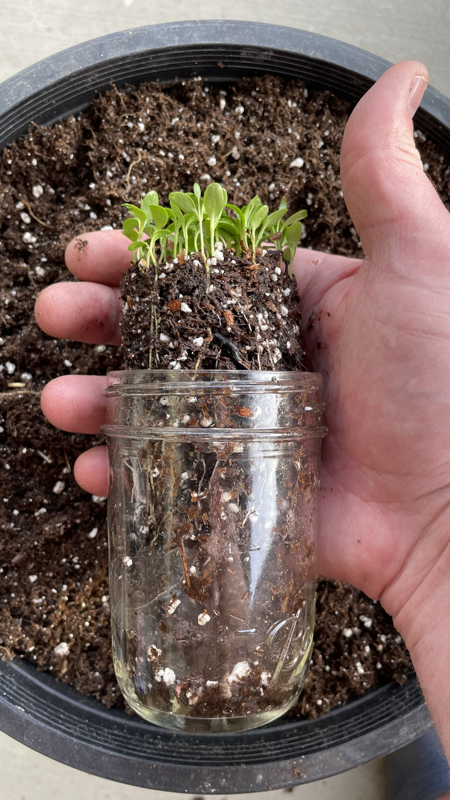
As an Amazon Associate, I earn from qualifying purchases. Milkweed seed germination in a jar 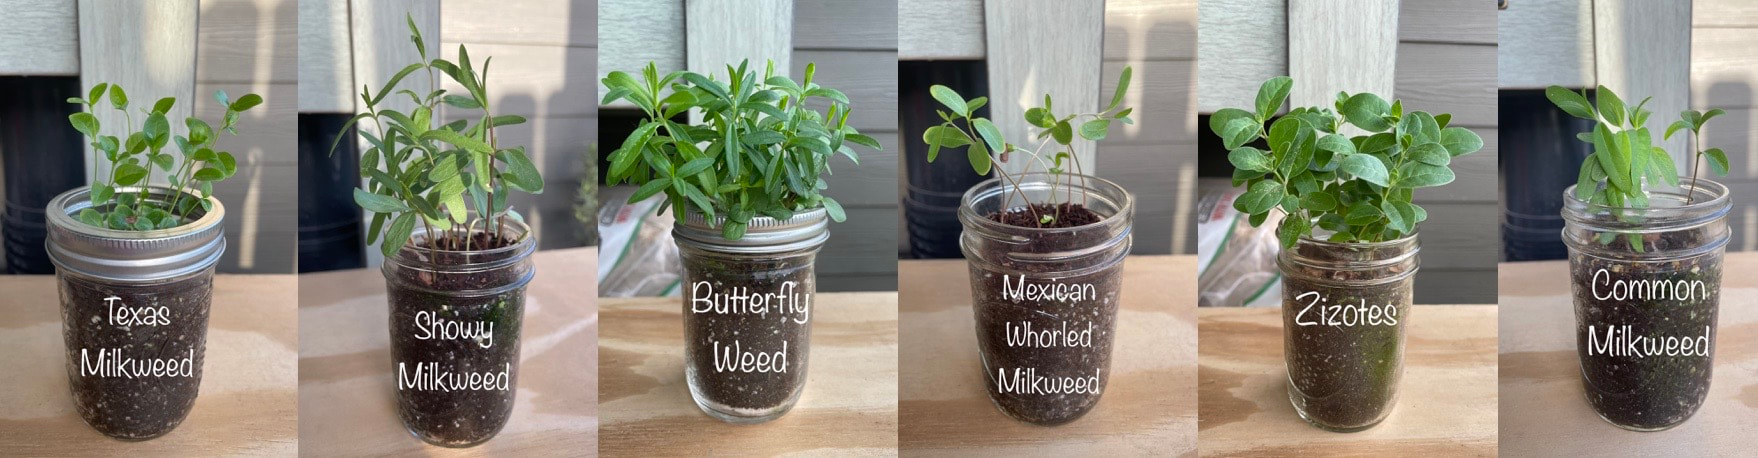 MaterialsMethod / Process
Tutorial with Pictuers
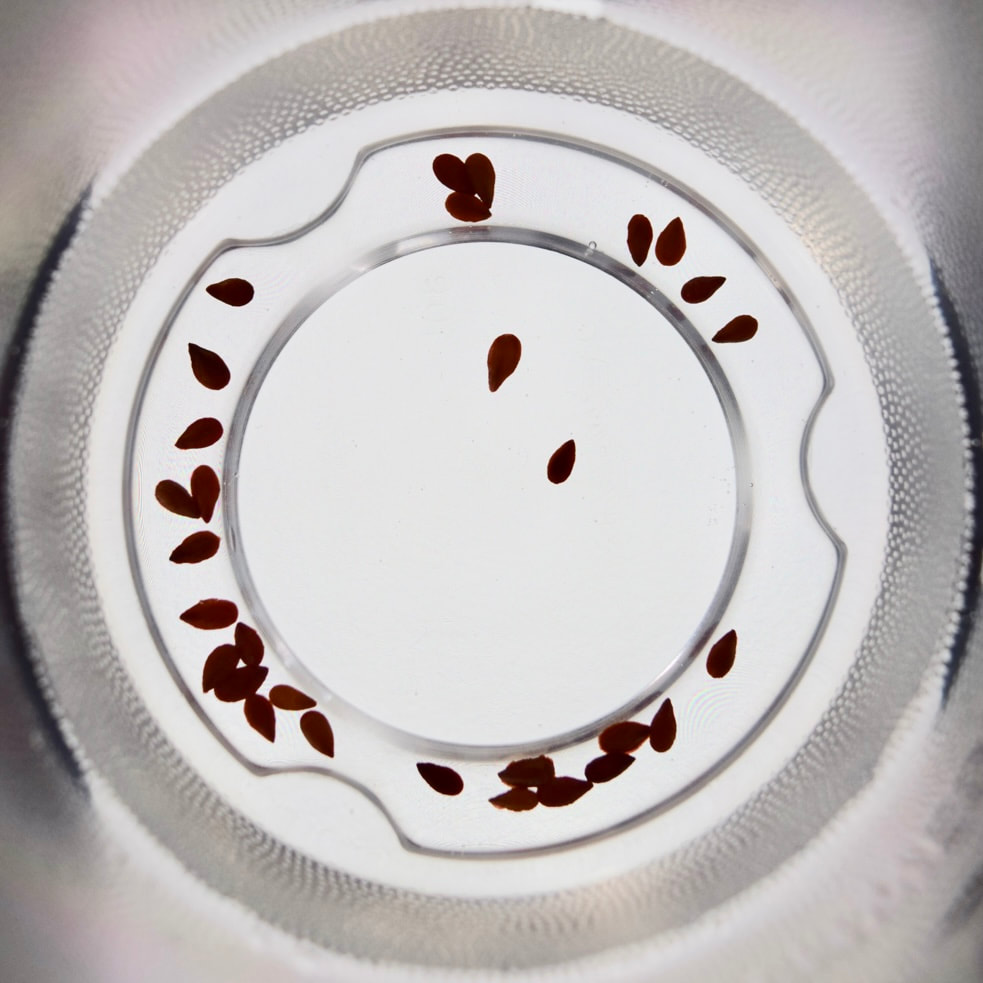
3. Remove the jar’s lid and sprinkle Milkweed Seeds on the surface of the soil. Leave the soil dry for this step. You are taking the seeds that have been soaking in water for 24 hours and planting them in this step. Do not overthink this step. Dry the seeds if it helps. Drop the seeds onto the surface of the dry soil. If you can, distribute the seeds evenly around the soil inside the jar. I like to plant about twenty five seeds in each jar. I will discourage you from planting more than fifty seeds or fewer than five seeds in each jar. Twenty to twenty five seeds is a manageable amount that yields good results. 4. Add four tablespoons of water over the seeds. Now it is time to add a measured amount of water to the jarmination container. Gently pour one tablespoon of water per two ounces of container size. Directions are written based on the assumption you are using the Ball Regular Mouth Canning Jar 8 oz. Adjust watering based on your container size by using the chart below.
5. Sprinkle the included Coconut Coir (dust/sand) evenly over the wet seeds and soil. In step 3 we sprinkled the seeds on the surface of the soil. In this step we thinly cover the seed with Coconut Coir. Not more than one tablespoon of Coconut Coir. The seeds do not need to be fully covered. Enough Coconut Coir to hug up against the seed is good. Do not water until three days has passed. 6. Place one 6x6 Cellophane Sheet over the jar with the butterfly hole centered. Put the ring of the jar lid back on. Try not to drop or shake the jar from here on out. Grab one Cellophane Sheets with Butterfly Holes. Place the cellophane sheet over the jar with the butterfly holes centered over the opening. Hold the cellophane in place with one hand. With your other hand grab the aluminum lid ring. Twist the lid onto the jar while pressing the cellophane down against the jar using even pressure. The cellophane sheet is now secured in place between the lid ring and the jar. Setup is complete!
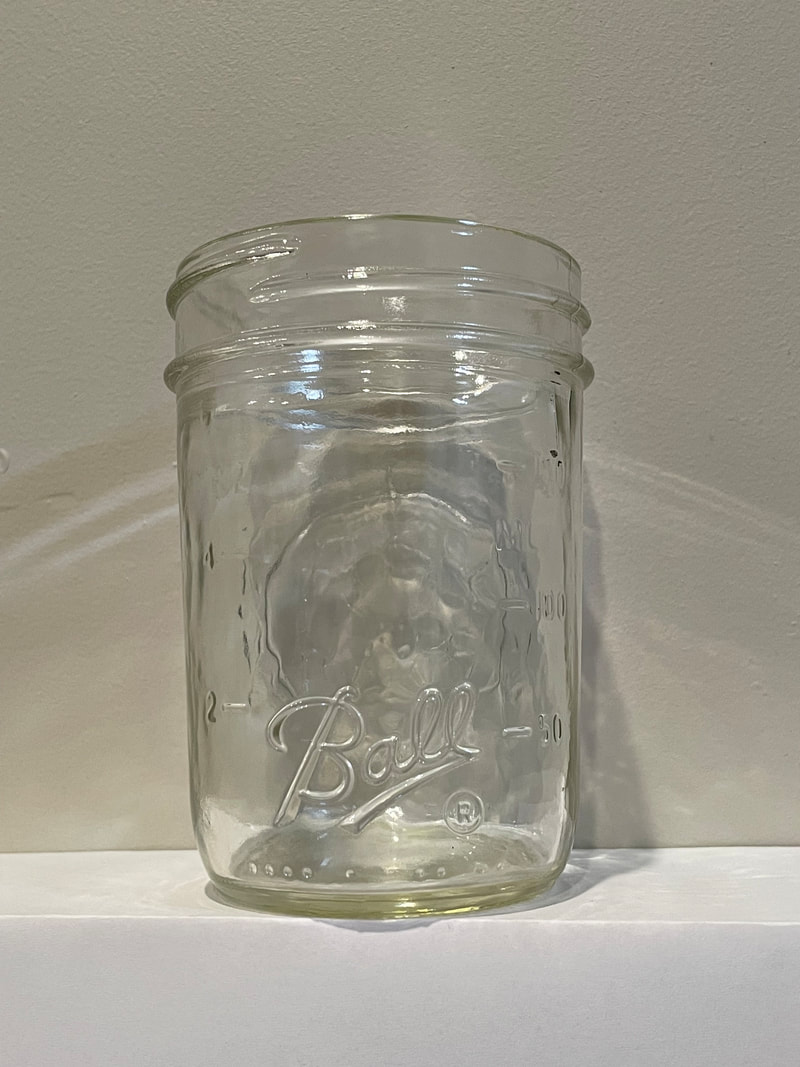
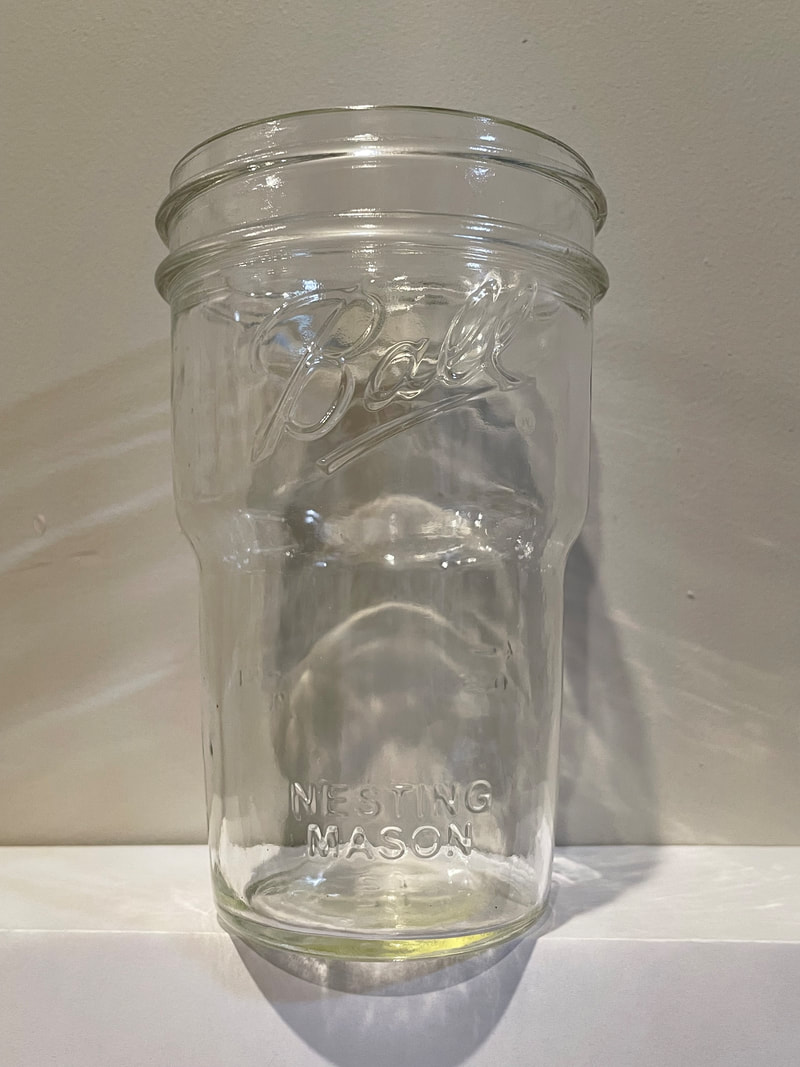
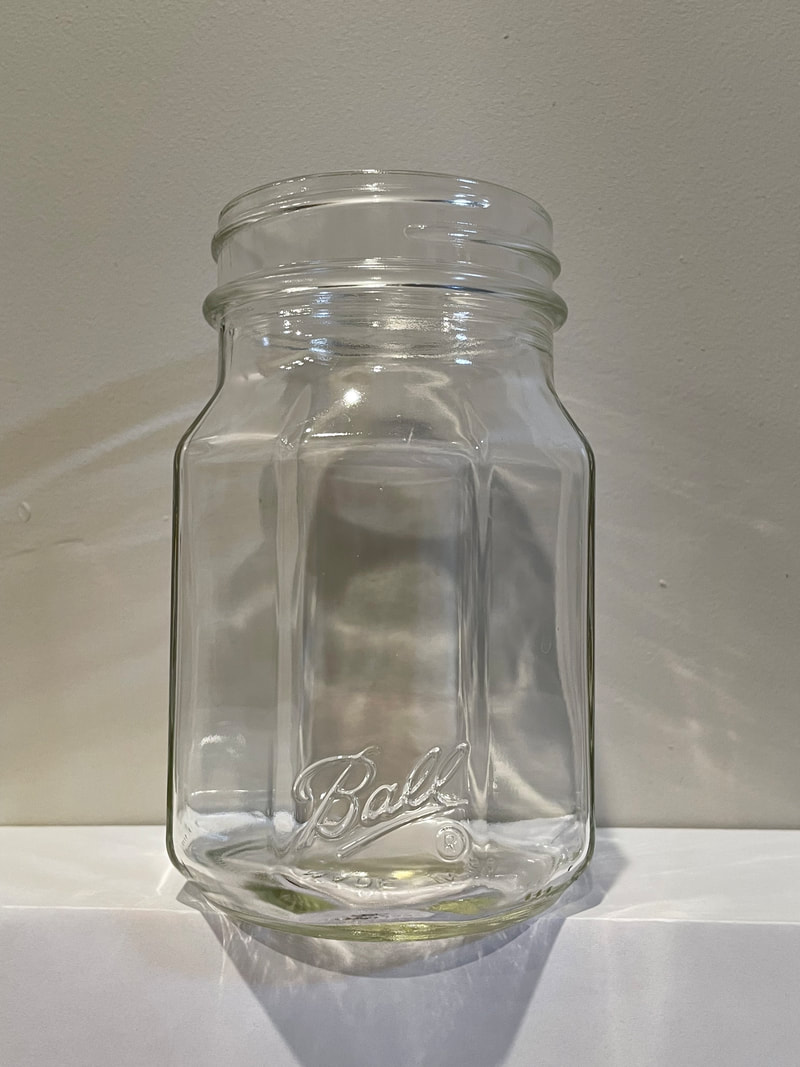
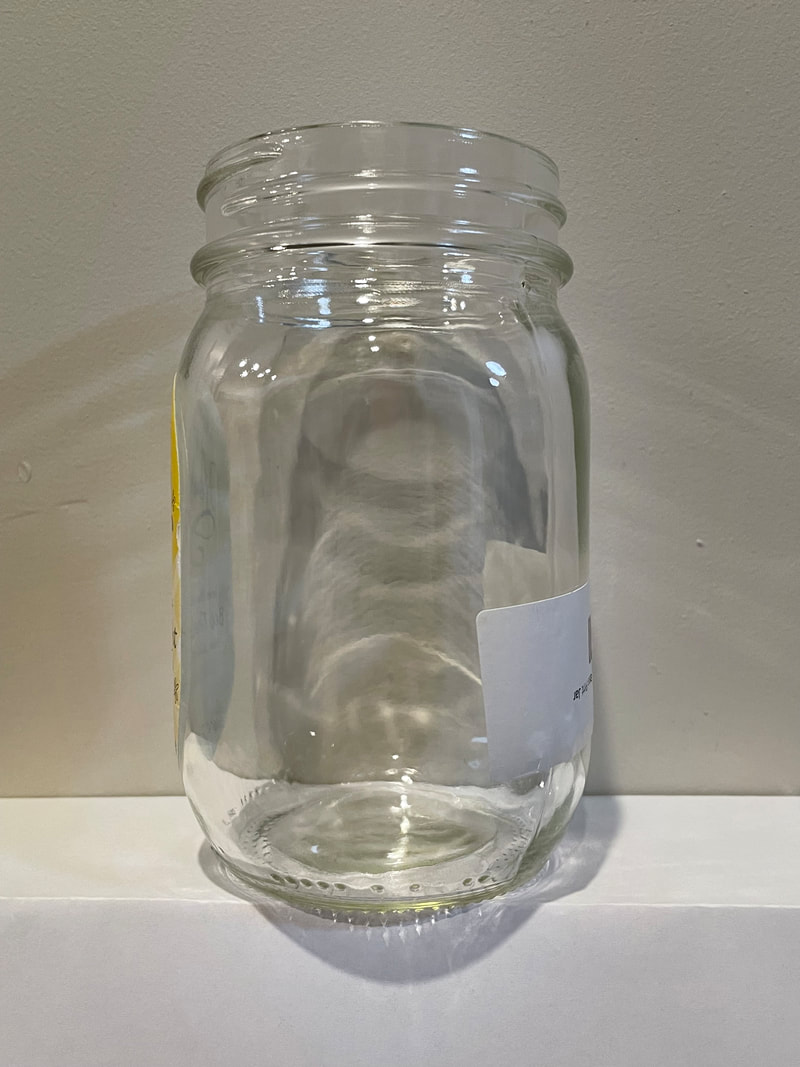
Jar Selection TipsSelecting the correct jar is important. Don't select a jar with a top narrower than the bottom. The opening at the top of the jar is called the mouth. The mouth of the jar must be as wide or wider than the rest of the jar. If the mouth of the jar narrows, even slightly. Don't use that jar. Removing the plants can become impossible when the mouth narrows. Use the examples below as a guide to select the correct jar shape. Can you see the YES jars (below) have mouths as wide or wider than the jar's bottom?
Can you see the NO jars (below) have wider bottoms than the mouth? The narrowing at the mouth of the jar is a NO. Do not use a jar with this shape.
ExamplesFree download ↩️
16 Comments
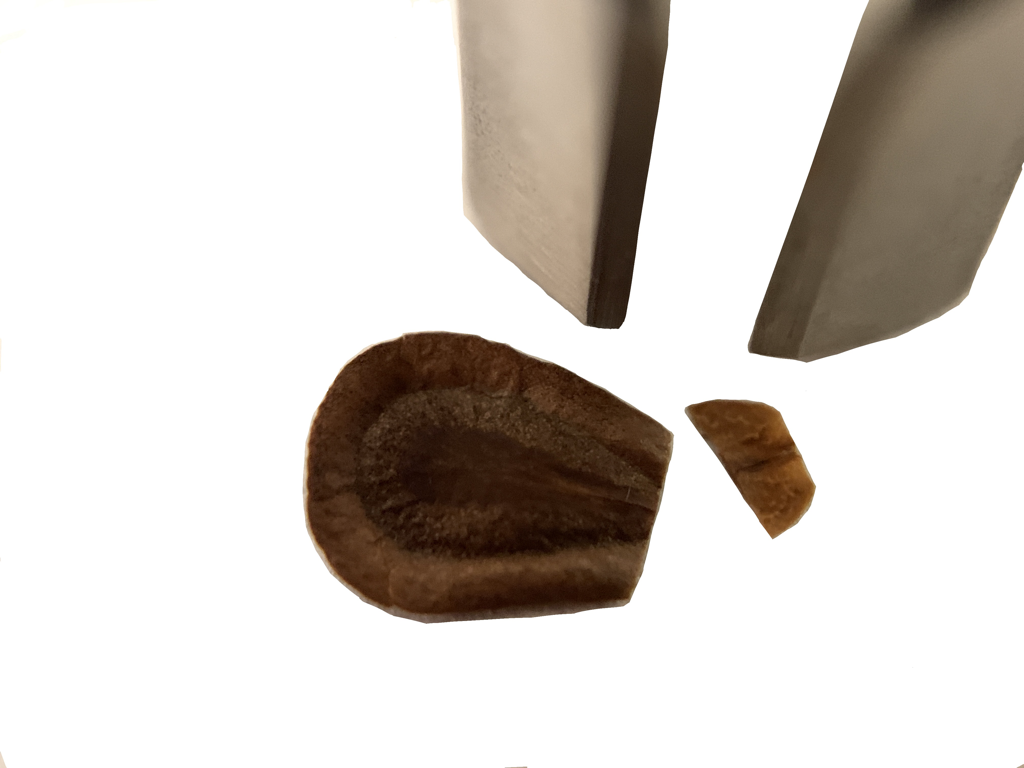
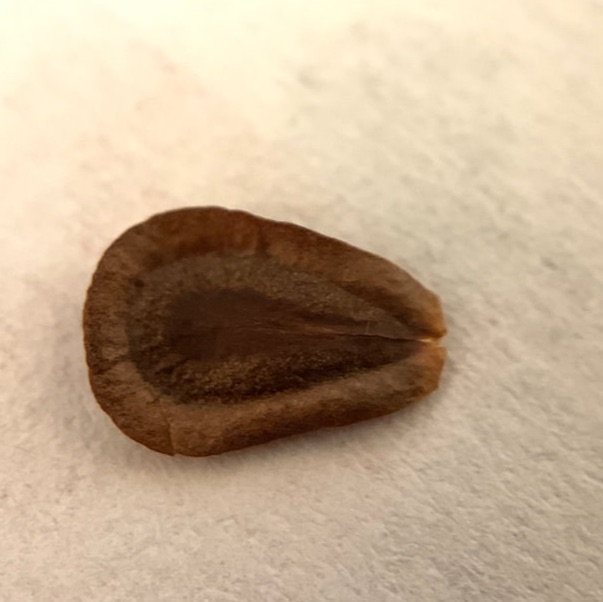
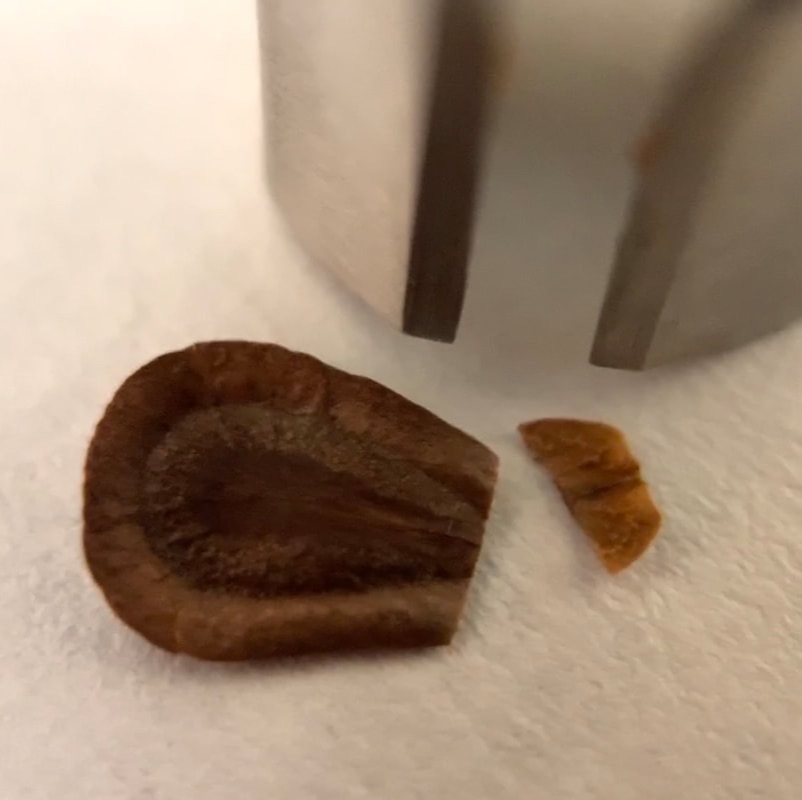
Clipping is a simple process. Clip off the tip of the milkweed seed. Milkweed seeds are drop shaped seeds. A milkweed seed has a wide round end and a narrow, pointy end. Clip off the narrow, pointy end. This is where the root grows. By clipping off the tip of the seed you can skip cold moist stratification and germinate the seed fast. Usually in less then a week if the seed is wet and warm. MATERIALS:• nail clippers, scissor or a knife (I prefer nail clippers like you see in the photo below) Process:In a single clean cut. Clip off the tip of the milkweed seed. Thats all. Now plant.
Which milkweed seeds benefit from clipping? Do clip (always optional)
Which milkweed seeds do not benefit from clipping? Do not clip
I have not been able to compare clipping and not clipping with every species of milkweed. The vast majority of milkweed in North America is hard to find, unless you are a butterfly. If the seed species is not listed above then it is unknown. As a reminder, clipping is always optional. Unknown: everything else History LessonAsclepias cordifolia has been one of the most challenging milkweed seeds to germinate and grow. Through discussions with members of the Grow Milkweed Plants group on facebook and other social media channels. I was encouraged to pull off the tip of the seed jacket that covers the root radical. Clipping was born, April 3rd 2018, at least to me. Keep reading for more history going back over forty years.
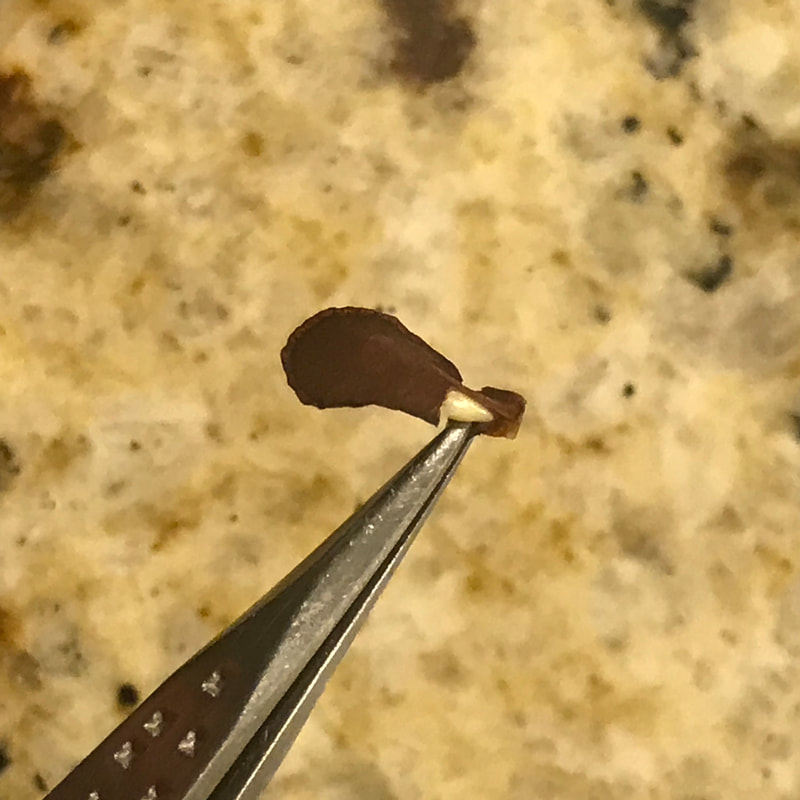
Having no formal education in plant biology. I did not even know this could be done without harming the seed let alone that it would help with germination. True origin and additional education about milkweed germination Written by Stephen Broyles, SCoRER=Seed Coat Over Root of Embryo Removed. "I have observed this technique of rapid seed milkweed seed germination evolve into “clipping” on Grow Milkweed since it was introduced on January 23, 2018. I have wanted to revisit the why and how of this technique for some time and make sure individuals do it for the right reasons and invest the time to perform the technique properly. Why? I started using SCoRER in the 1980’s while in graduate school. I was using enzyme electrophoresis to study genetic variation, hybridization, and pollen movement in populations of milkweeds. Enzyme electrophoresis worked best on actively growing seedlings. At the time, I was using seeds of A. amplexicaulis, A. exaltata, A. purpurascens, and A. syriaca that usually required moist-cold stratification for germination. SCoRER allowed me to overcome cold stratification and produce actively growing seedlings quickly when needed. I needed thousands of seedlings to be grown in an efficient and well-timed manner. If I simply need germinating seeds to produce plants and you are patient, then six weeks in moist soil placed in a freezer works well. Proper removal of the seed coat is tricky, time consuming, and requires some finger dexterity. If you are patient (Broyles is not), then cold-moist stratification for these species is easier and effective. The technique. . .(a) seeds were soaked on moist filter paper for 2-3 days to soften tissue, (b) a single edge razor blade was used to CAREFULLY cut into the seed coat to pop the seed coat covering off the embryonic root, (c) the seed was returned to the moist filter paper and placed under bright lights.
For those of you who use the methods of clipping using fingernail clippers, you are likely cutting through the root and ruining many of your seeds. I recommend modifying your technique to protect the root or choosing another method (cold-moist stratification) to germinate your seeds. Obviously, many species (e.g., A. tuberosa, A. curassavica, A. incarnata, A. perennis, etc) do not require any stratification to germinate and sowing in moist soil is easy and quick. While I have used the SCoRER method for nearly 40 years, the acronym was constructed in my early morning daze of 21 January 2022." -Steven Broyles
|
Site SearchAuthorMake milkweed your friend. Your friends will love your milkweed. My name is Brad. Learn more about me now. 
Brad Grimm
Blog Archives
March 2022
Blog Categories
All
email Subscriber archive |
|||||||||||||||||||||||||
-
Home
- About
- Why Grow Milkweed Plants
- Contact
-
Map
>
-
USA
>
- Alabama
- Alaska
- Arizona
- Arkansas
- California
- Colorado
- Connecticut
- Delaware
- District of Columbia
- Florida
- Georgia
- Hawaii
- Idaho
- Illinois
- Indiana
- Iowa
- Kansas
- Kentucky
- Louisiana
- Maine
- Maryland
- Massachusetts
- Michigan
- Minnesota
- Mississippi
- Missouri
- Montana
- Nebraska
- Nevada
- New Hampshire
- New Jersey
- New Mexico
- New York
- North Carolina
- North Dakota
- Ohio
- Oklahoma
- Oregon
- Pennsylvania
- Rhode Island
- South Carolina
- South Dakota
- Tennessee
- Texas
- Utah
- Vermont
- Virginia
- Washington
- West Virginia
- Wisconsin
- Wyoming
- Canada >
- Mexico >
-
USA
>
- FAQ
-
Milkweed
- Aquatic milkweed, Asclepias perennis
- Arizona milkweed, Asclepias angustifolia
- Bear mountain milkweed, Asclepias scaposa
- Bract milkweed, Asclepias brachystephana
- Broadleaf milkweed, Asclepias latifolia
- Butterfly milkweed, Asclepias tuberosa
- California milkweed, Asclepias californica
- Carolina milkweed, Asclepias cinerea
- Clasping milkweed, Asclepias amplexicaulis
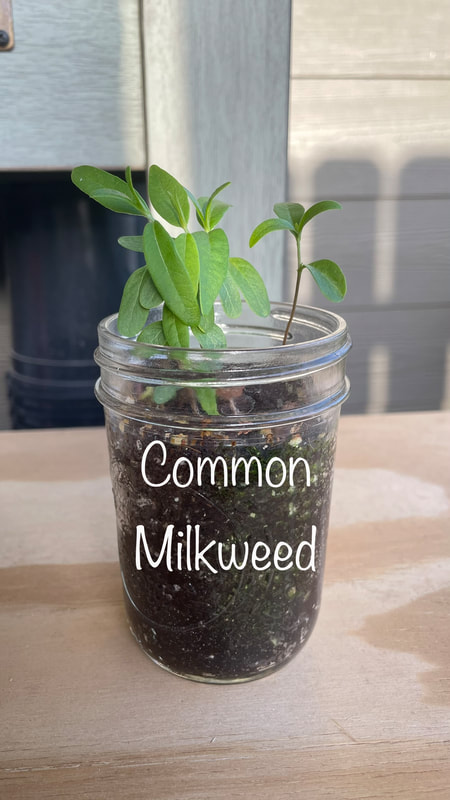
- Common milkweed, Asclepias syriaca
- Curtiss' milkweed, Asclepias curtissii
- Cutler's milkweed, Asclepias cutleri
- Desert milkweed, Asclepias erosa
- Dwarf milkweed, Asclepias involucrata
- Emory's milkweed, Asclepias emoryi
- Engelmann's milkweed, Asclepias engelmanniana
- Fewflower milkweed, Asclepias lanceolata
- Florida milkweed, Asclepias feayi
- Fourleaf milkweed, Asclepias quadrifolia
- Green antelopehorn, Asclepias viridis
- Green Comet milkweed, Asclepias viridiflora
- Greene's milkweed, Asclepias californica ssp. greenei
- Hall's milkweed, Asclepias hallii
- Heartleaf milkweed, Asclepias cordifolia
- Horsetail milkweed, Asclepias subverticillata
- Jewel milkweed, Asclepias cryptoceras
- Largeflower milkweed, Asclepias connivens
- Lemmon's milkweed, Asclepias lemmonii
- Longhood milkweed, Asclepias macrotis
- Longleaf milkweed, Asclepias longifolia
- Mahogany milkweed, Asclepias hypoleuca
- Mead's milkweed, Asclepias meadii
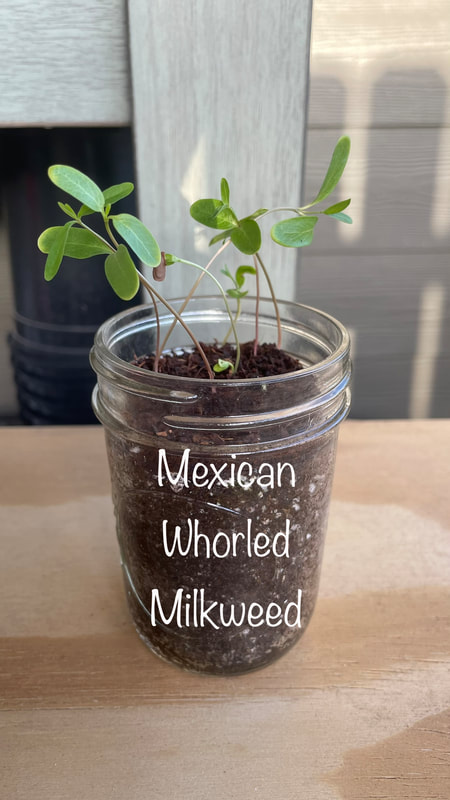
- Mexican whorled milkweed, Asclepias fascicularis
- Michaux's milkweed, Asclepias michauxii
- Mojave milkweed, Asclepias nyctaginifolia
- Nodding milkweed, Asclepias glaucescens
- Oval-leaf milkweed, Asclepias ovalifolia
- Parish's woolly milkweed, Asclepias vestita
- Pineland milkweed, Asclepias obovata
- Pineneedle milkweed, Asclepias linaria
- Pinewoods milkweed, Asclepias humistrata
- Plains milkweed, Asclepias pumila
- Poke milkweed, Asclepias exaltata
- Prairie milkweed, Asclepias sullivantii
- Prostrate milkweed, Asclepias prostrata
- Purple milkweed, Asclepias purpurascens
- Red milkweed, Asclepias rubra
- Redring milkweed, Asclepias variegata
- Rusby's milkweed, Asclepias rusbyi
- Rush milkweed, Asclepias subulata
- Ruth's milkweed, Asclepias uncialis
- Sand milkweed, Asclepias arenaria
- Savannah milkweed, Asclepias pedicellata
- Serpentine milkweed, Asclepias solanoana
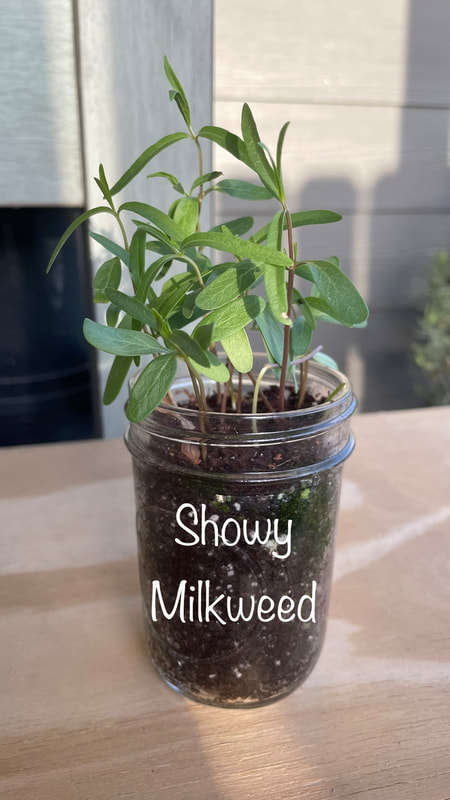
- Showy milkweed, Asclepias speciosa
- Sidecluster milkweed, Asclepias lanuginosa
- Slim milkweed, Asclepias linearis
- Slimleaf milkweed, Asclepias stenophylla
- Slimpod milkweed, Asclepias quinquedentata
- Southern milkweed, Asclepias viridula
- Sperry's milkweed, Asclepias sperryi
- Spider milkweed, Asclepias asperula
- Swamp milkweed, Asclepias incarnata
- Swamp milkweed, Asclepias incarnata ssp. pulchra
- Tall green milkweed, Asclepias hirtella
- Texas milkweed, Asclepias texana
- Tuba milkweed, Asclepias tomentosa
- Tufted milkweed, Asclepias nummularia
- Utah milkweed, Asclepias labriformis
- Welsh's milkweed, Asclepias welshii
- Wheel milkweed, Asclepias uncialis
- Whitestem milkweed, Asclepias albicans
- Whorled milkweed, Asclepias verticillata
- Woolly milkweed, Asclepias vestita
- Woollypod milkweed, Asclepias eriocarpa
- Zizotes milkweed, Asclepias oenotheroides
- Store
- Podcast
- Blog
- Resources
-
Home
- About
- Why Grow Milkweed Plants
- Contact
-
Map
>
-
USA
>
- Alabama
- Alaska
- Arizona
- Arkansas
- California
- Colorado
- Connecticut
- Delaware
- District of Columbia
- Florida
- Georgia
- Hawaii
- Idaho
- Illinois
- Indiana
- Iowa
- Kansas
- Kentucky
- Louisiana
- Maine
- Maryland
- Massachusetts
- Michigan
- Minnesota
- Mississippi
- Missouri
- Montana
- Nebraska
- Nevada
- New Hampshire
- New Jersey
- New Mexico
- New York
- North Carolina
- North Dakota
- Ohio
- Oklahoma
- Oregon
- Pennsylvania
- Rhode Island
- South Carolina
- South Dakota
- Tennessee
- Texas
- Utah
- Vermont
- Virginia
- Washington
- West Virginia
- Wisconsin
- Wyoming
- Canada >
- Mexico >
-
USA
>
- FAQ
-
Milkweed
- Aquatic milkweed, Asclepias perennis
- Arizona milkweed, Asclepias angustifolia
- Bear mountain milkweed, Asclepias scaposa
- Bract milkweed, Asclepias brachystephana
- Broadleaf milkweed, Asclepias latifolia
- Butterfly milkweed, Asclepias tuberosa
- California milkweed, Asclepias californica
- Carolina milkweed, Asclepias cinerea
- Clasping milkweed, Asclepias amplexicaulis
- Common milkweed, Asclepias syriaca
- Curtiss' milkweed, Asclepias curtissii
- Cutler's milkweed, Asclepias cutleri
- Desert milkweed, Asclepias erosa
- Dwarf milkweed, Asclepias involucrata
- Emory's milkweed, Asclepias emoryi
- Engelmann's milkweed, Asclepias engelmanniana
- Fewflower milkweed, Asclepias lanceolata
- Florida milkweed, Asclepias feayi
- Fourleaf milkweed, Asclepias quadrifolia
- Green antelopehorn, Asclepias viridis
- Green Comet milkweed, Asclepias viridiflora
- Greene's milkweed, Asclepias californica ssp. greenei
- Hall's milkweed, Asclepias hallii
- Heartleaf milkweed, Asclepias cordifolia
- Horsetail milkweed, Asclepias subverticillata
- Jewel milkweed, Asclepias cryptoceras
- Largeflower milkweed, Asclepias connivens
- Lemmon's milkweed, Asclepias lemmonii
- Longhood milkweed, Asclepias macrotis
- Longleaf milkweed, Asclepias longifolia
- Mahogany milkweed, Asclepias hypoleuca
- Mead's milkweed, Asclepias meadii
- Mexican whorled milkweed, Asclepias fascicularis
- Michaux's milkweed, Asclepias michauxii
- Mojave milkweed, Asclepias nyctaginifolia
- Nodding milkweed, Asclepias glaucescens
- Oval-leaf milkweed, Asclepias ovalifolia
- Parish's woolly milkweed, Asclepias vestita
- Pineland milkweed, Asclepias obovata
- Pineneedle milkweed, Asclepias linaria
- Pinewoods milkweed, Asclepias humistrata
- Plains milkweed, Asclepias pumila
- Poke milkweed, Asclepias exaltata
- Prairie milkweed, Asclepias sullivantii
- Prostrate milkweed, Asclepias prostrata
- Purple milkweed, Asclepias purpurascens
- Red milkweed, Asclepias rubra
- Redring milkweed, Asclepias variegata
- Rusby's milkweed, Asclepias rusbyi
- Rush milkweed, Asclepias subulata
- Ruth's milkweed, Asclepias uncialis
- Sand milkweed, Asclepias arenaria
- Savannah milkweed, Asclepias pedicellata
- Serpentine milkweed, Asclepias solanoana
- Showy milkweed, Asclepias speciosa
- Sidecluster milkweed, Asclepias lanuginosa
- Slim milkweed, Asclepias linearis
- Slimleaf milkweed, Asclepias stenophylla
- Slimpod milkweed, Asclepias quinquedentata
- Southern milkweed, Asclepias viridula
- Sperry's milkweed, Asclepias sperryi
- Spider milkweed, Asclepias asperula
- Swamp milkweed, Asclepias incarnata
- Swamp milkweed, Asclepias incarnata ssp. pulchra
- Tall green milkweed, Asclepias hirtella
- Texas milkweed, Asclepias texana
- Tuba milkweed, Asclepias tomentosa
- Tufted milkweed, Asclepias nummularia
- Utah milkweed, Asclepias labriformis
- Welsh's milkweed, Asclepias welshii
- Wheel milkweed, Asclepias uncialis
- Whitestem milkweed, Asclepias albicans
- Whorled milkweed, Asclepias verticillata
- Woolly milkweed, Asclepias vestita
- Woollypod milkweed, Asclepias eriocarpa
- Zizotes milkweed, Asclepias oenotheroides
- Store
- Podcast
- Blog
- Resources