|
As an Amazon Associate, I earn from qualifying purchases. Milkweed seed germination in a jar 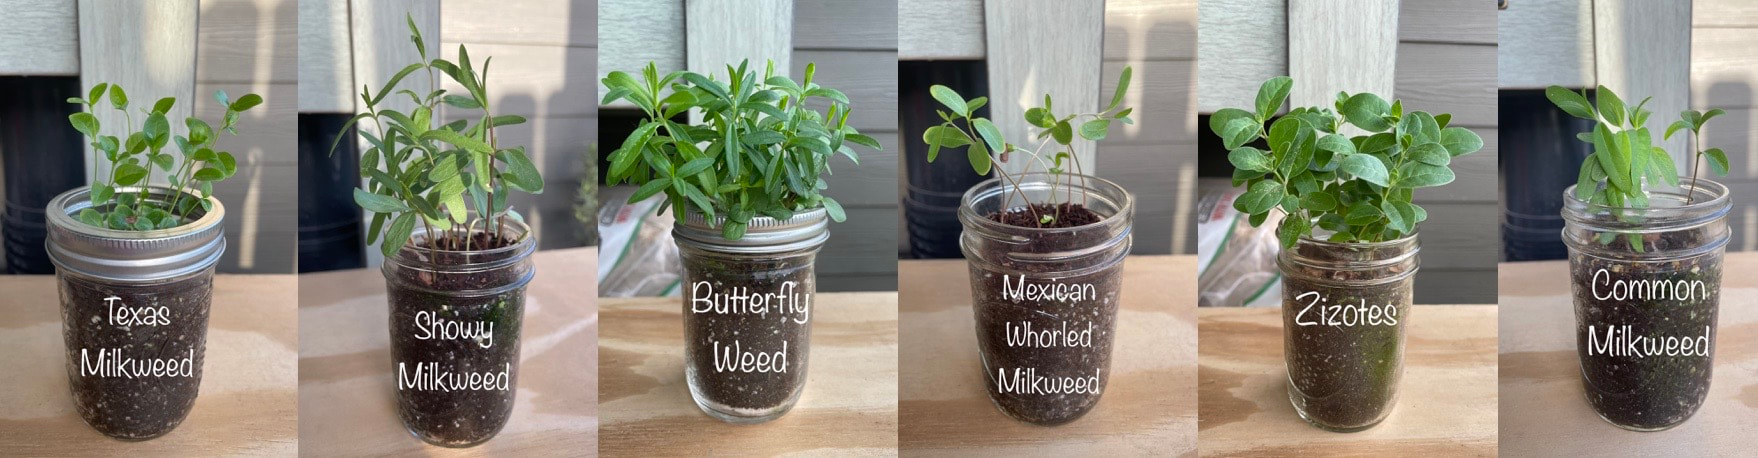 MaterialsMethod / Process
Tutorial with Pictuers
3. Remove the jar’s lid and sprinkle Milkweed Seeds on the surface of the soil. Leave the soil dry for this step. You are taking the seeds that have been soaking in water for 24 hours and planting them in this step. Do not overthink this step. Dry the seeds if it helps. Drop the seeds onto the surface of the dry soil. If you can, distribute the seeds evenly around the soil inside the jar. I like to plant about twenty five seeds in each jar. I will discourage you from planting more than fifty seeds or fewer than five seeds in each jar. Twenty to twenty five seeds is a manageable amount that yields good results. 4. Add four tablespoons of water over the seeds. Now it is time to add a measured amount of water to the jarmination container. Gently pour one tablespoon of water per two ounces of container size. Directions are written based on the assumption you are using the Ball Regular Mouth Canning Jar 8 oz. Adjust watering based on your container size by using the chart below.
5. Sprinkle the included Coconut Coir (dust/sand) evenly over the wet seeds and soil. In step 3 we sprinkled the seeds on the surface of the soil. In this step we thinly cover the seed with Coconut Coir. Not more than one tablespoon of Coconut Coir. The seeds do not need to be fully covered. Enough Coconut Coir to hug up against the seed is good. Do not water until three days has passed. 6. Place one 6x6 Cellophane Sheet over the jar with the butterfly hole centered. Put the ring of the jar lid back on. Try not to drop or shake the jar from here on out. Grab one Cellophane Sheets with Butterfly Holes. Place the cellophane sheet over the jar with the butterfly holes centered over the opening. Hold the cellophane in place with one hand. With your other hand grab the aluminum lid ring. Twist the lid onto the jar while pressing the cellophane down against the jar using even pressure. The cellophane sheet is now secured in place between the lid ring and the jar. Setup is complete!
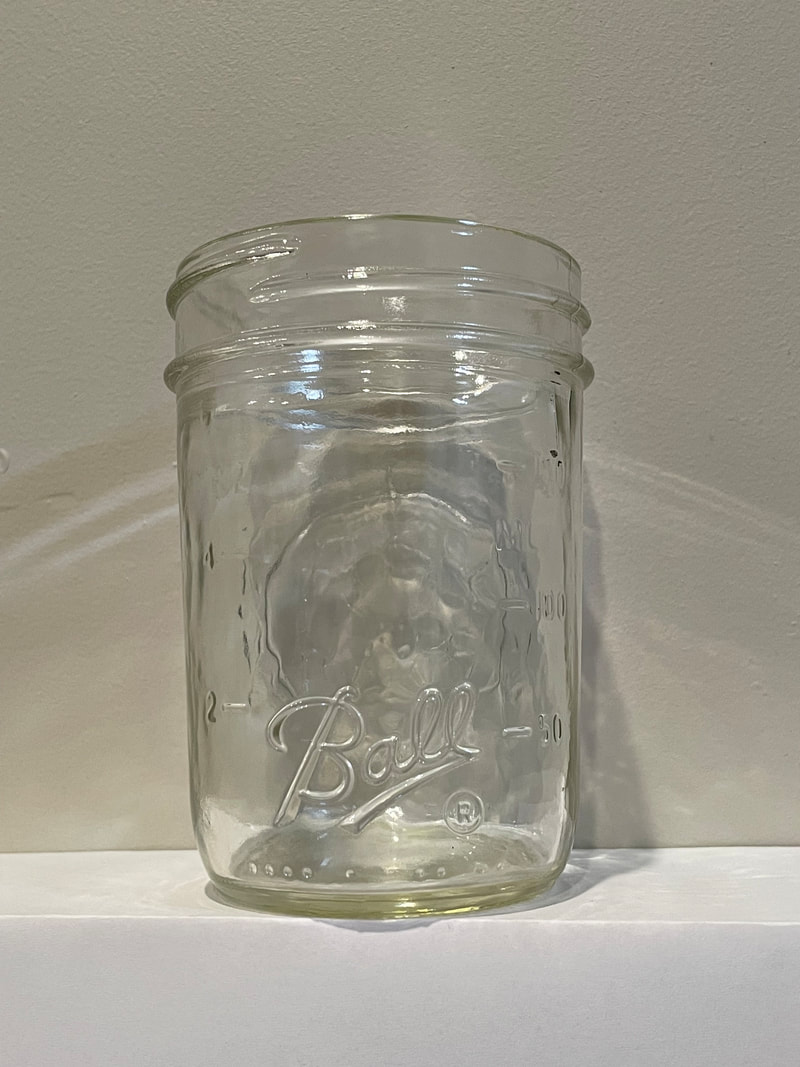
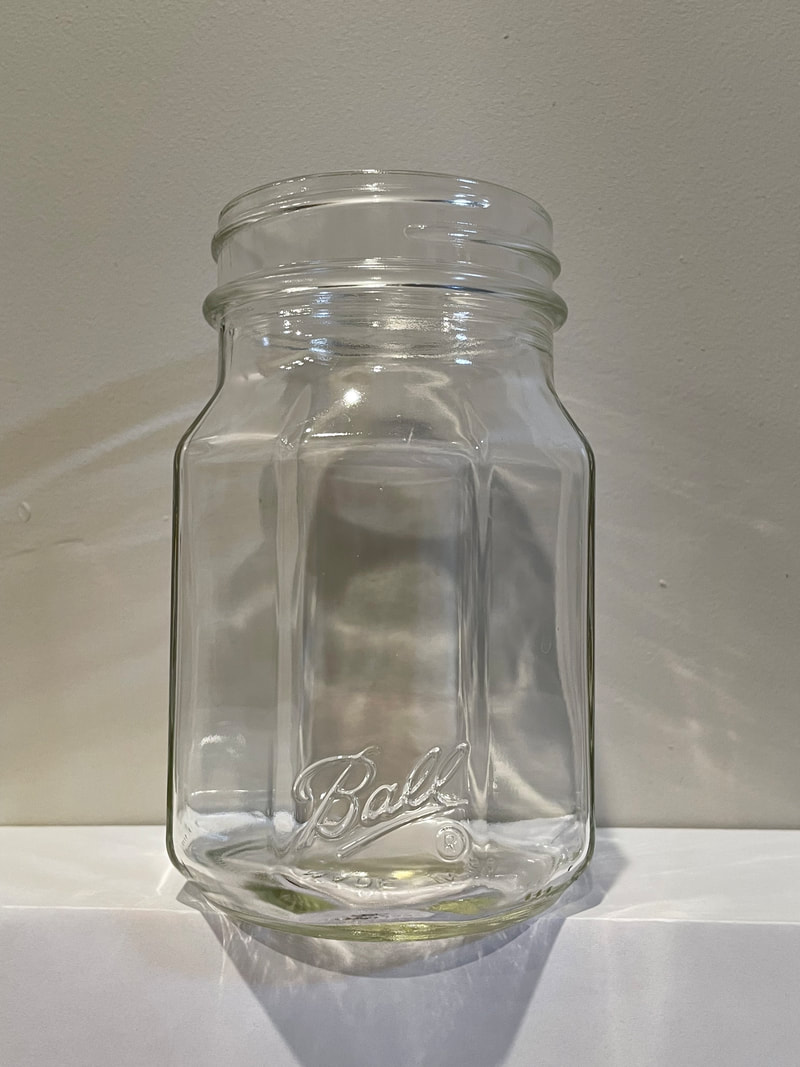
Jar Selection TipsSelecting the correct jar is important. Don't select a jar with a top narrower than the bottom. The opening at the top of the jar is called the mouth. The mouth of the jar must be as wide or wider than the rest of the jar. If the mouth of the jar narrows, even slightly. Don't use that jar. Removing the plants can become impossible when the mouth narrows. Use the examples below as a guide to select the correct jar shape. Can you see the YES jars (below) have mouths as wide or wider than the jar's bottom?
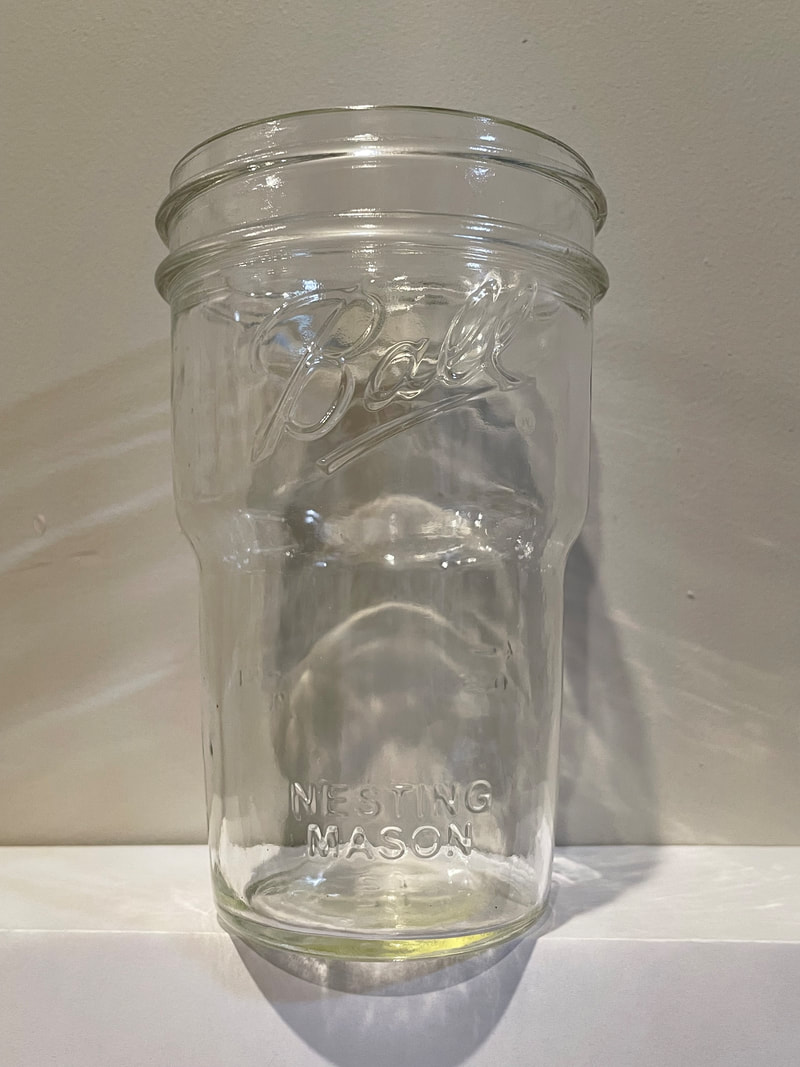
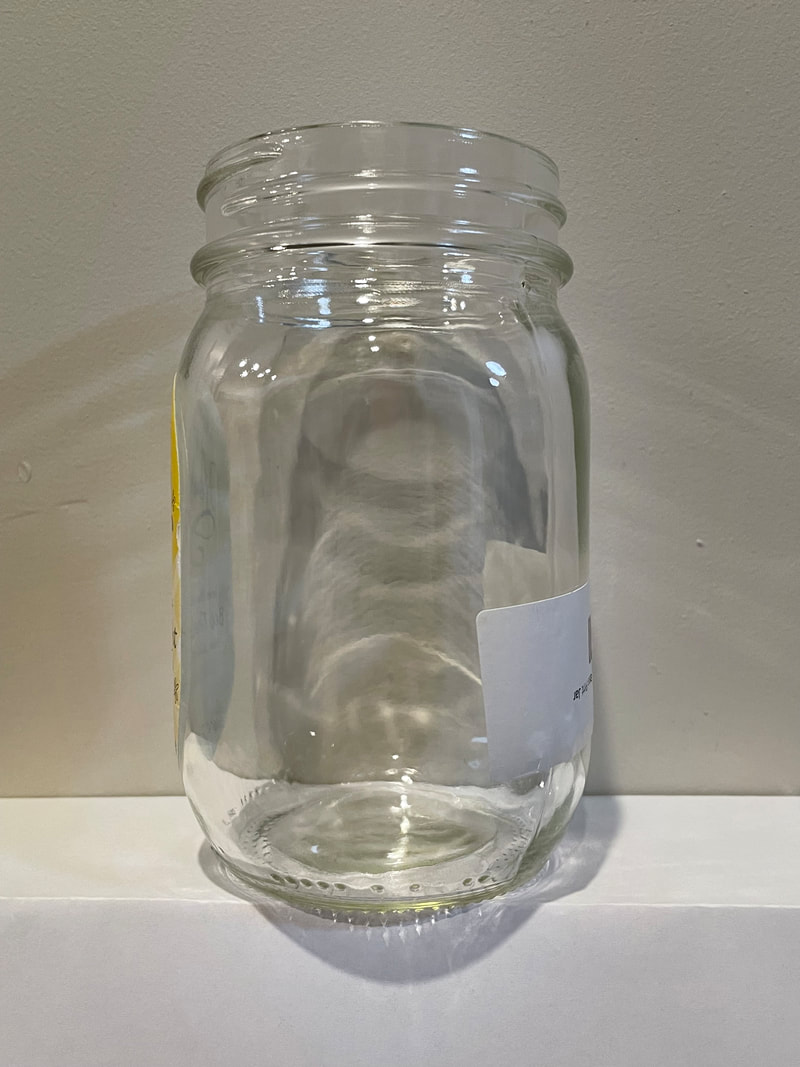
Can you see the NO jars (below) have wider bottoms than the mouth? The narrowing at the mouth of the jar is a NO. Do not use a jar with this shape.
ExamplesFree download ↩️
16 Comments
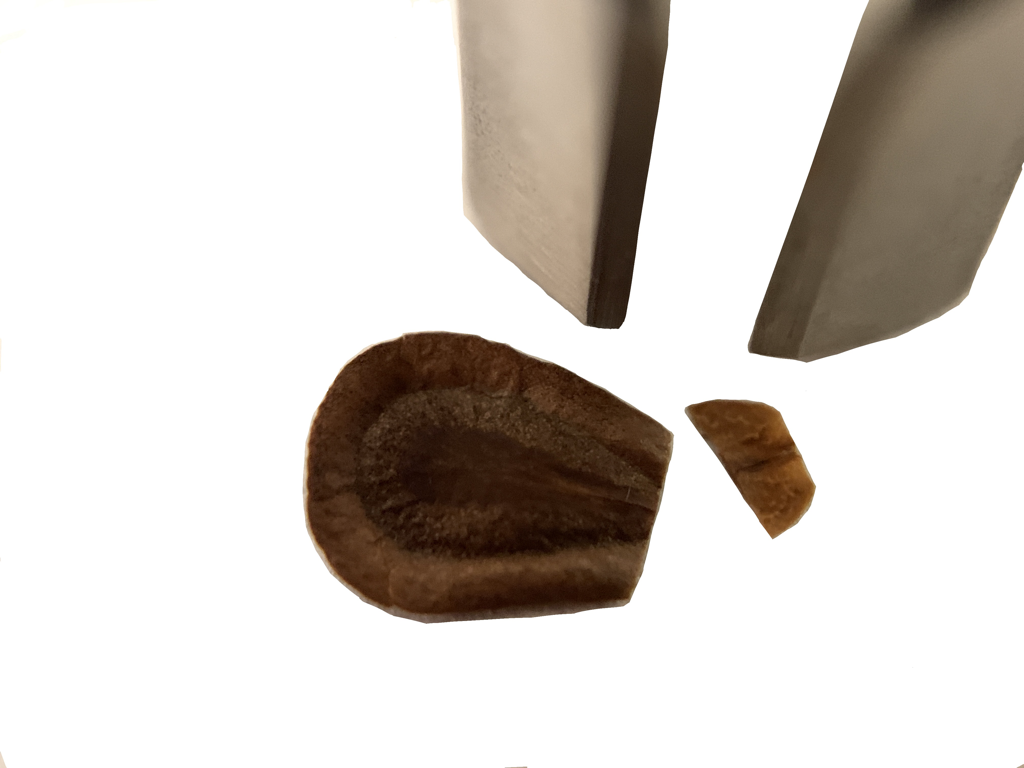
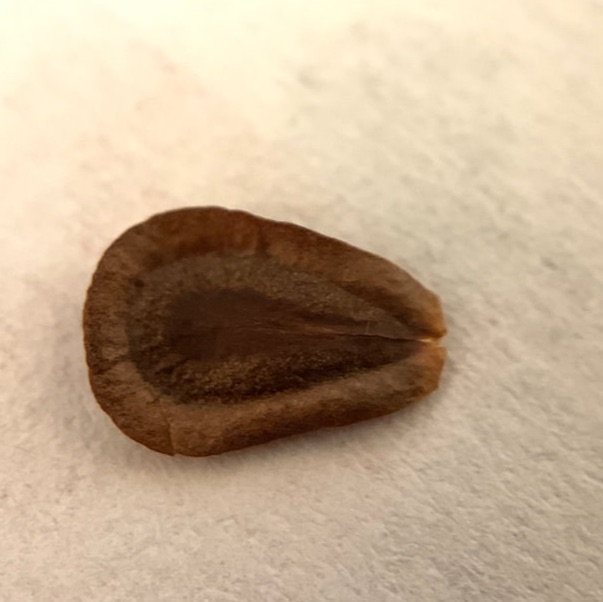
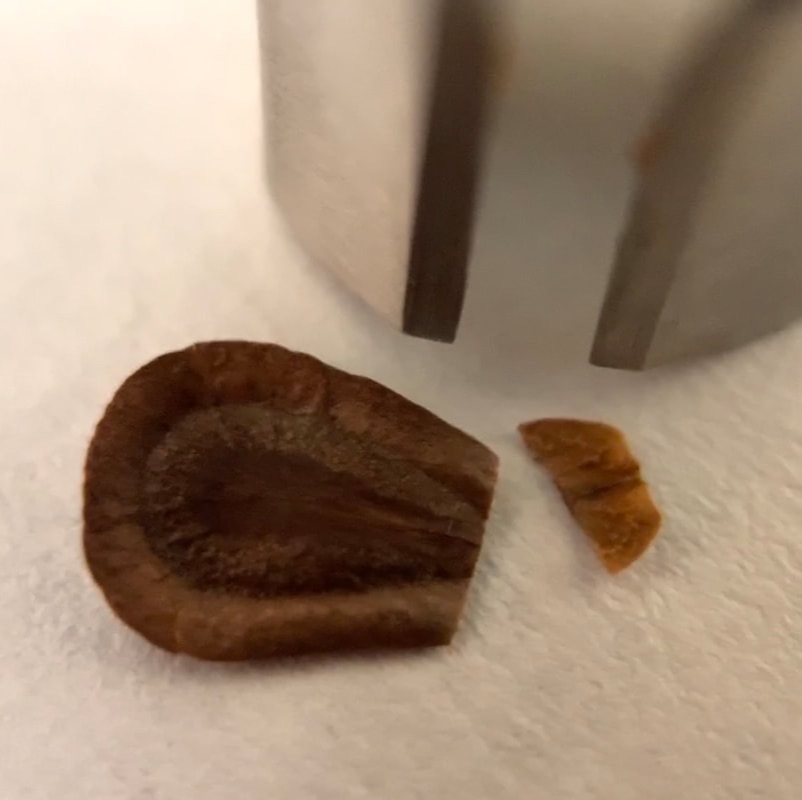
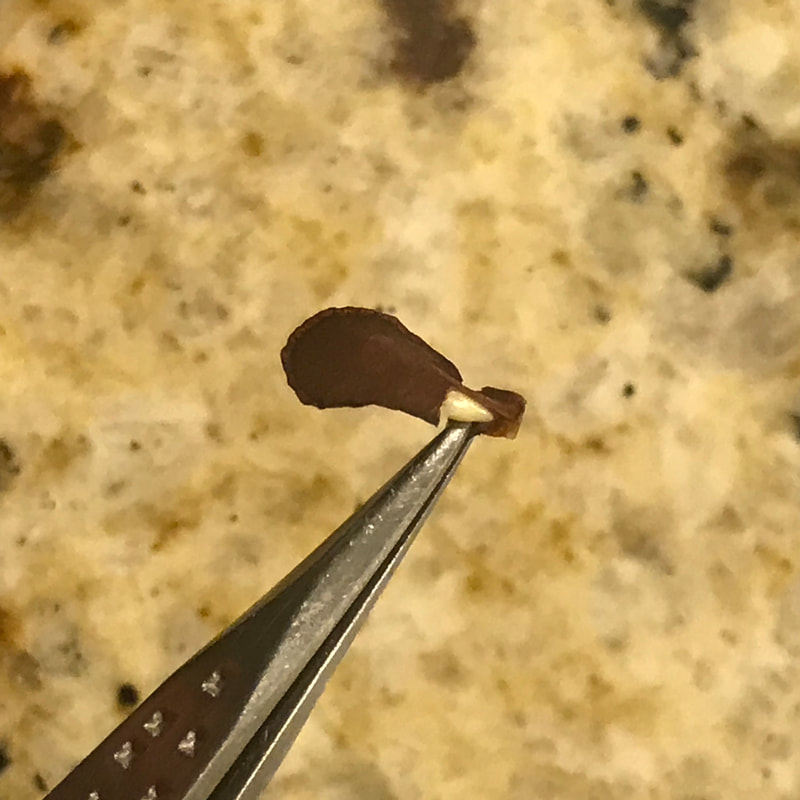
Clipping is a simple process. Clip off the tip of the milkweed seed. Milkweed seeds are drop shaped seeds. A milkweed seed has a wide round end and a narrow, pointy end. Clip off the narrow, pointy end. This is where the root grows. By clipping off the tip of the seed you can skip cold moist stratification and germinate the seed fast. Usually in less then a week if the seed is wet and warm. MATERIALS:• nail clippers, scissor or a knife (I prefer nail clippers like you see in the photo below) Process:In a single clean cut. Clip off the tip of the milkweed seed. Thats all. Now plant.
Which milkweed seeds benefit from clipping? Do clip (always optional)
Which milkweed seeds do not benefit from clipping? Do not clip
I have not been able to compare clipping and not clipping with every species of milkweed. The vast majority of milkweed in North America is hard to find, unless you are a butterfly. If the seed species is not listed above then it is unknown. As a reminder, clipping is always optional. Unknown: everything else History LessonAsclepias cordifolia has been one of the most challenging milkweed seeds to germinate and grow. Through discussions with members of the Grow Milkweed Plants group on facebook and other social media channels. I was encouraged to pull off the tip of the seed jacket that covers the root radical. Clipping was born, April 3rd 2018, at least to me. Keep reading for more history going back over forty years.
Having no formal education in plant biology. I did not even know this could be done without harming the seed let alone that it would help with germination. True origin and additional education about milkweed germination Written by Stephen Broyles, SCoRER=Seed Coat Over Root of Embryo Removed. "I have observed this technique of rapid seed milkweed seed germination evolve into “clipping” on Grow Milkweed since it was introduced on January 23, 2018. I have wanted to revisit the why and how of this technique for some time and make sure individuals do it for the right reasons and invest the time to perform the technique properly. Why? I started using SCoRER in the 1980’s while in graduate school. I was using enzyme electrophoresis to study genetic variation, hybridization, and pollen movement in populations of milkweeds. Enzyme electrophoresis worked best on actively growing seedlings. At the time, I was using seeds of A. amplexicaulis, A. exaltata, A. purpurascens, and A. syriaca that usually required moist-cold stratification for germination. SCoRER allowed me to overcome cold stratification and produce actively growing seedlings quickly when needed. I needed thousands of seedlings to be grown in an efficient and well-timed manner. If I simply need germinating seeds to produce plants and you are patient, then six weeks in moist soil placed in a freezer works well. Proper removal of the seed coat is tricky, time consuming, and requires some finger dexterity. If you are patient (Broyles is not), then cold-moist stratification for these species is easier and effective. The technique. . .(a) seeds were soaked on moist filter paper for 2-3 days to soften tissue, (b) a single edge razor blade was used to CAREFULLY cut into the seed coat to pop the seed coat covering off the embryonic root, (c) the seed was returned to the moist filter paper and placed under bright lights.
For those of you who use the methods of clipping using fingernail clippers, you are likely cutting through the root and ruining many of your seeds. I recommend modifying your technique to protect the root or choosing another method (cold-moist stratification) to germinate your seeds. Obviously, many species (e.g., A. tuberosa, A. curassavica, A. incarnata, A. perennis, etc) do not require any stratification to germinate and sowing in moist soil is easy and quick. While I have used the SCoRER method for nearly 40 years, the acronym was constructed in my early morning daze of 21 January 2022." -Steven Broyles
Hanging on to what you grew in the summer sun is a wonderful dream. Bud's, blooms and photosynthesis in December shouldn't be a daydream. Don't let the fall time change get you down. Stop fretting over decumbent stems. Despite the darkness and cold weather; you can grow all winter! Let's Hang On to what we grew in the summer.
Giving the orchid you got in July a home for the winter sound's nice. Is it practical? Can that giant milkweed really get giant-er? Don't let your temperamental houseplant take that prime spot in front of your only south facing window. Can you give your plants a tropical vacation that lasts all four seasons? You betcha!
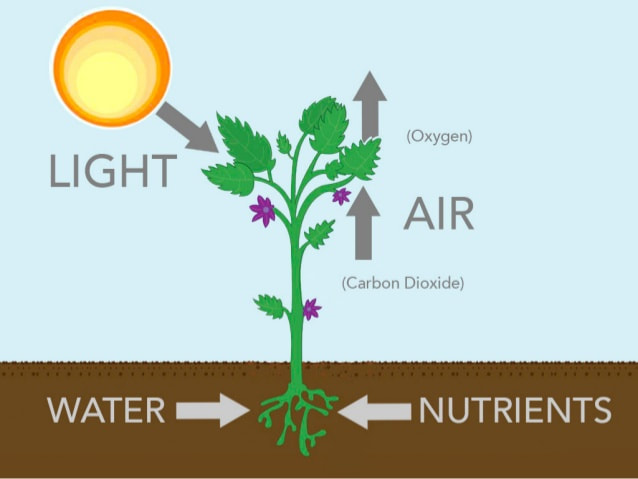
How an Endless Summer Works
How a grow tent will improve your odds of success
Unlike a windowsill, grow tents use a reflective material inside to maximize and intensify the light. Walls reflect and diffuse the light, exposing plants to a greater concentration of light compared to growing indoors.
Your grow tent is extremely helpful when it comes to controlling the Air and Light around your plants. Protecting your plants from cold weather is the main goal. The air inside the grow tent will be maintained above a minimum temperature and below a maximum temperature that is set by you. Humidity of the air inside the grow tent is usually around 75%. Outside air humidity in Nevada is frequently below 15%. The higher humidity is an added bonus that makes the plants very happy inside the grow tent. The reflective material inside the grow tent maximizes the efficiency of the lighting. The grow tent is not a greenhouse. It can be placed where it gets no sunlight. A closet or garage are perfectly good locations for a grow tent. You will need access to an electrical outlet to power the lighting.
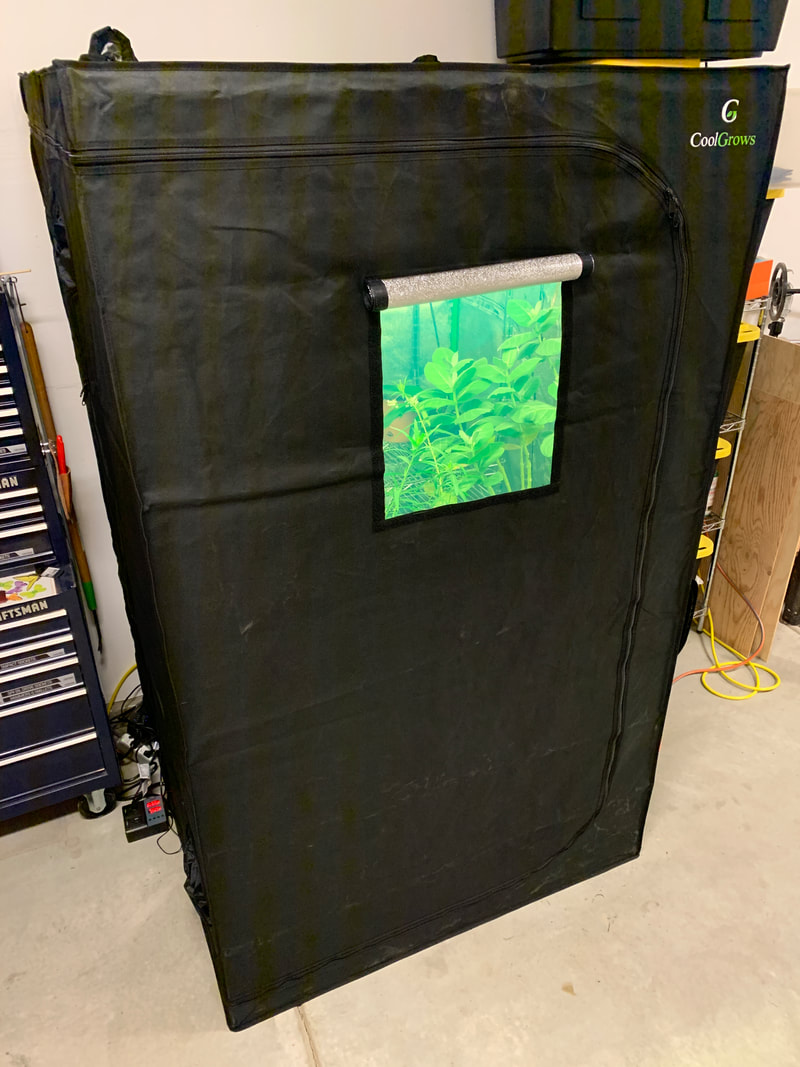
12 Products to Grow Milkweed Plants in all 4 seasonsSelect the largest grow tent you have space for
There is a grow tent for every space. The largest grow tent I could fit in my garage has a 48"x48" footprint and is 80" tall. If your space is smaller, get a smaller tent. Have more space? Consider getting a larger grow tent.
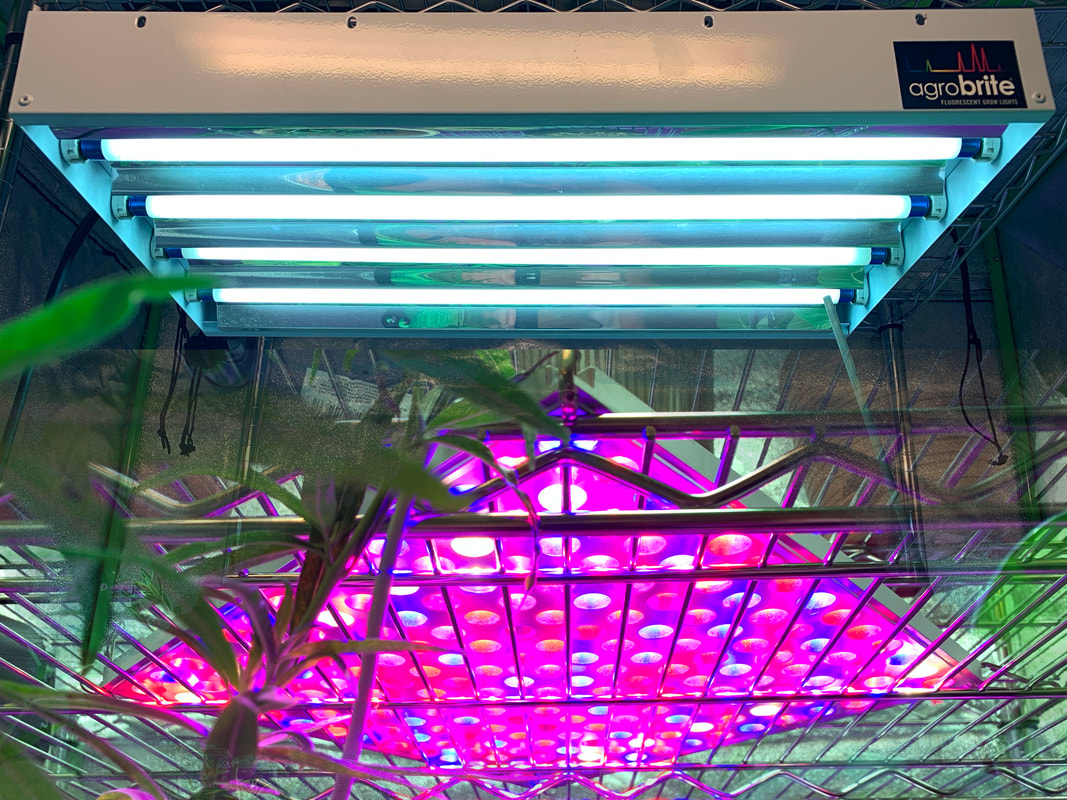
Place light fixtures over your plants
The number of options for lights is nearly unlimited. Select Fluorescent or LED. The important thing here is the light fixture should fit the grow tent. Add more lights if necessary. Keep the plants well illuminated.
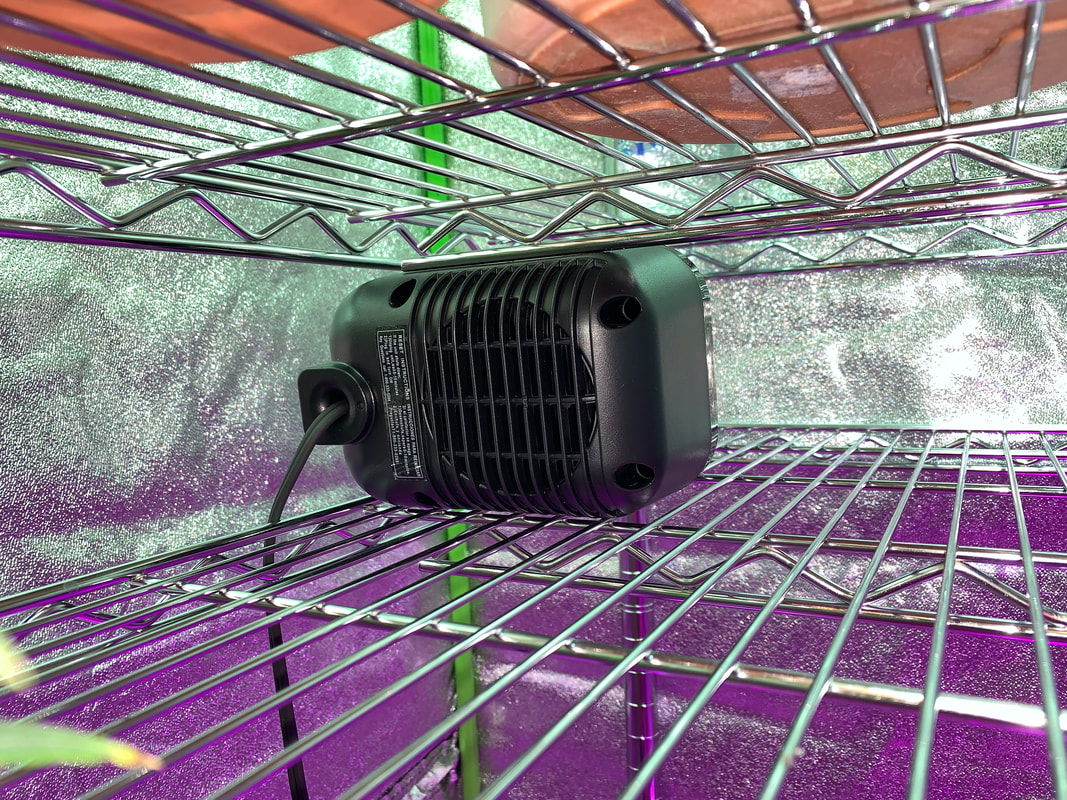
Warm the grow tent with space heaters
A grow tent is not the same as a greenhouse. A greenhouse gets heat from the sun. A grow tent needs a heater. Select a heat source that will raise the temperature inside the grow tent safely and efficiently.
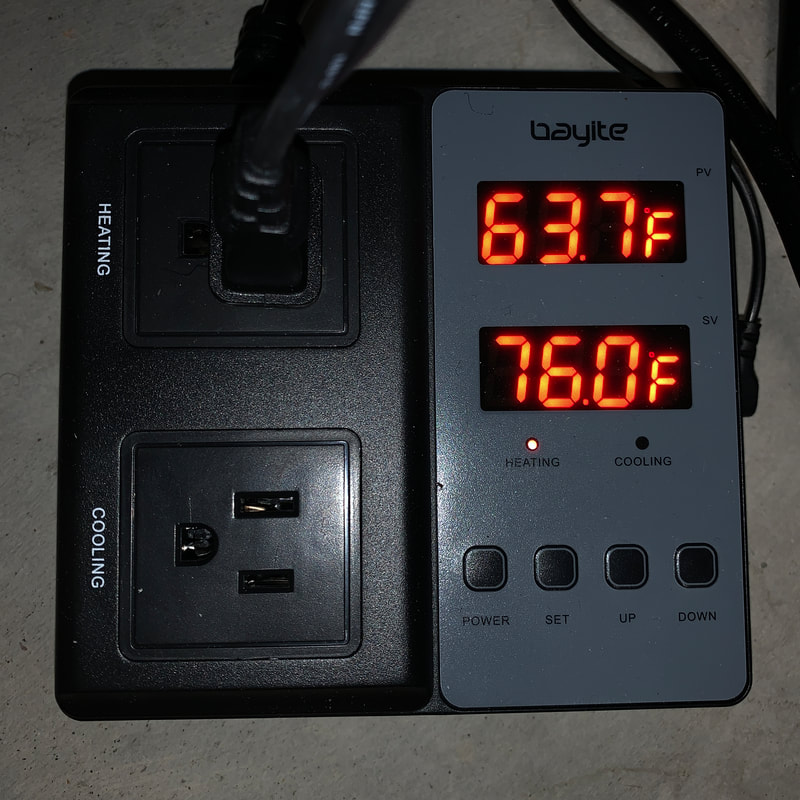
Automate the temperature and lighting
Technology makes the grow tent go. Automate the temperature and lighting. The digital timer and temperature controller ensures plants receive even lighting while preventing drastic changes to their environment.
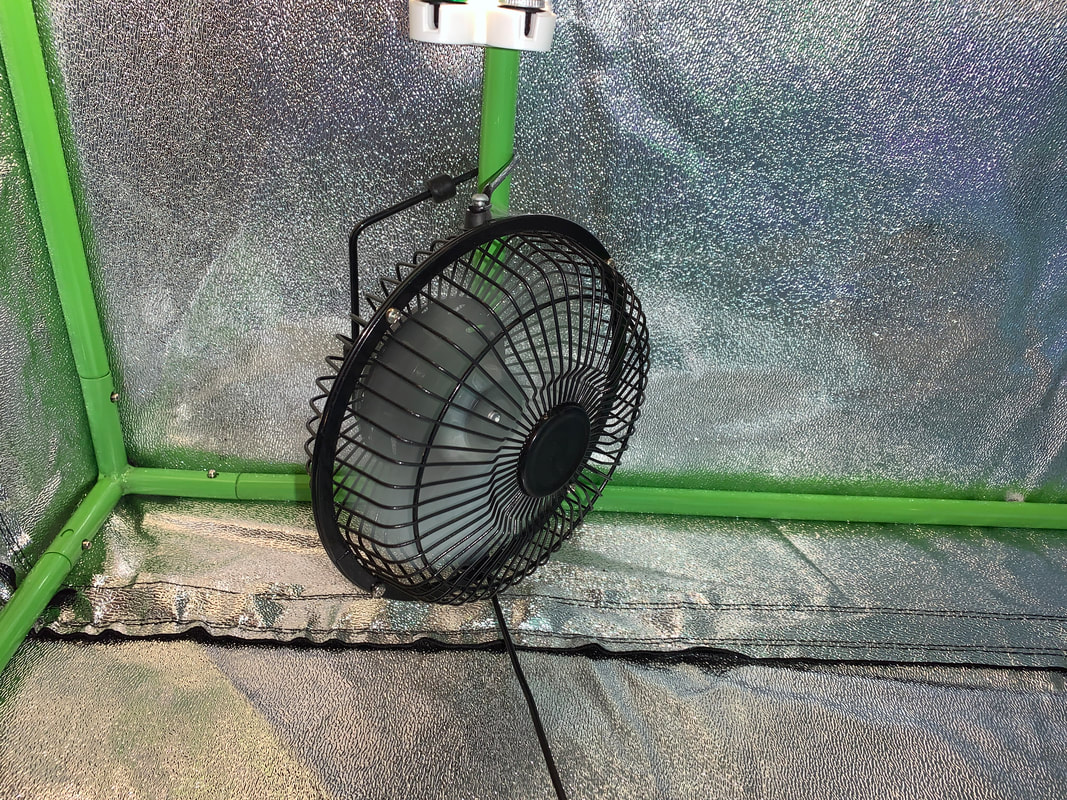
Mitigate potential problems with circulation
Don't grow in a static environment. Air circulation is absolutely necessary inside a grow tent. It's a proven fact that plants grow stronger and healthier stems when exposed to moving air.
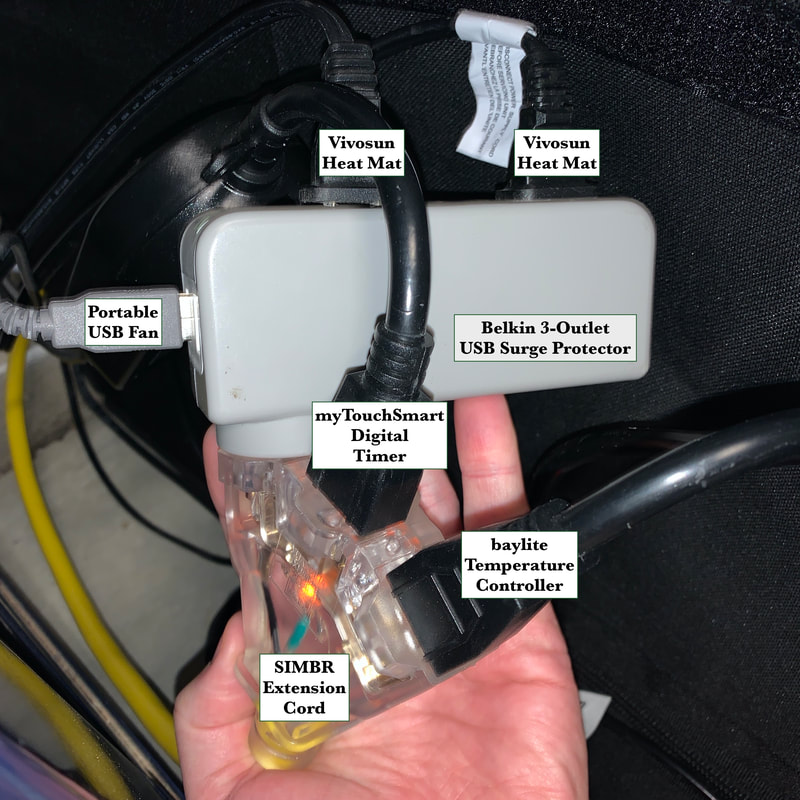
Power the grow tent with safe electricity
Supply electricity to the grow tent without creating a fire hazard. A 15 Amp extension cord could be excessive. I'd rather be safe that sorry. Don't overload outlets. Never plug a surge protector into another surge protector.
*This blog post contains affiliate links to Amazon products that may help you germinate and grow milkweed plants.
Download this file |
||||||||||||||||||||||||||||||||||||||||||||||||||||||||||||||||||||||||||||||||||||||||||||||||||||||||||||||||


| clipping.pdf |
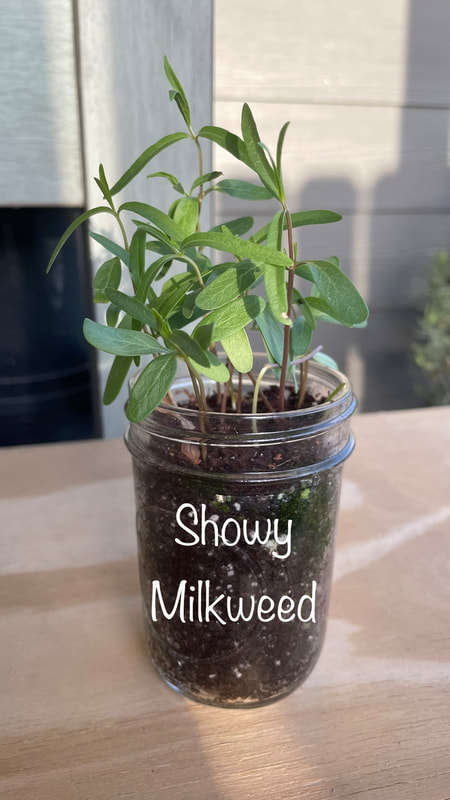
Water Germination of Showy Milkweed Seeds
In this test seeds of Asclepias speciosa (showy milkweed) were used. The seeds were collected in the fall of 2017. Under normal conditions the seeds would have fell to the ground in September. Their tough exterior would have been exposed to the weather during the winter. Snow and rain would have stratified the seed and prepared them to grow in the late spring.
The seeds being tested have not lived a normal life. These seeds were collected from ripe opening pods on top of milkweed plants that were beginning to go dormant after a long hot summer. After being collected they were separated from their seed pod and the milkweed silk that could have carried them thru the air. The seeds are dried for a few weeks in the open air and then stored in open bags indoors.
To be fair, nature does a pretty good job. Milkweed has been growing for thousands of years without any human intervention. On the other hand, one milkweed plant can cast out thousands of seeds and only a tiny fraction of those seeds will find the right conditions to grow. Milkweed seeds do benefit from Cold Moist Stratification which can be simulated in the refrigerator. It takes time to cold moist stratify milkweed seeds and may not be necessary. What if there is a faster way that works?
Materials
- 1 Seedling Heat Mat *Durable Waterproof Seedling Heat Mat Warm Hydroponic Heating Pad
- 1 Gallon Dechlorinated Water (tap water set out for 24 hours in an open container)
- 1 Thermometer *Non-contact Digital Laser Infrared Thermometer Temperature Gun
- 1 Plastic Dome any plastic tub that has an opening bigger then the plate will work
Start of Water Germination2/10/18 12:00 68° 26 seeds placed in coffee filter and placed on plate. Poured dechlorinated water into plate to submerge seeds and wet filter. 2/10/18 21:00 68° drained water off plate. Added fresh dechlorinated water. Day One2/11/18 09:00 66° drained water off plate. Added fresh dechlorinated water. 2/11/18 21:00 water temp was 63° based on infrared thermometer. Drained water off plate (dropped half the seeds in the sink). Put seeds back and added dechlorinated water. Placed heat mat under plate. Water temp at 22:00 is 70° | 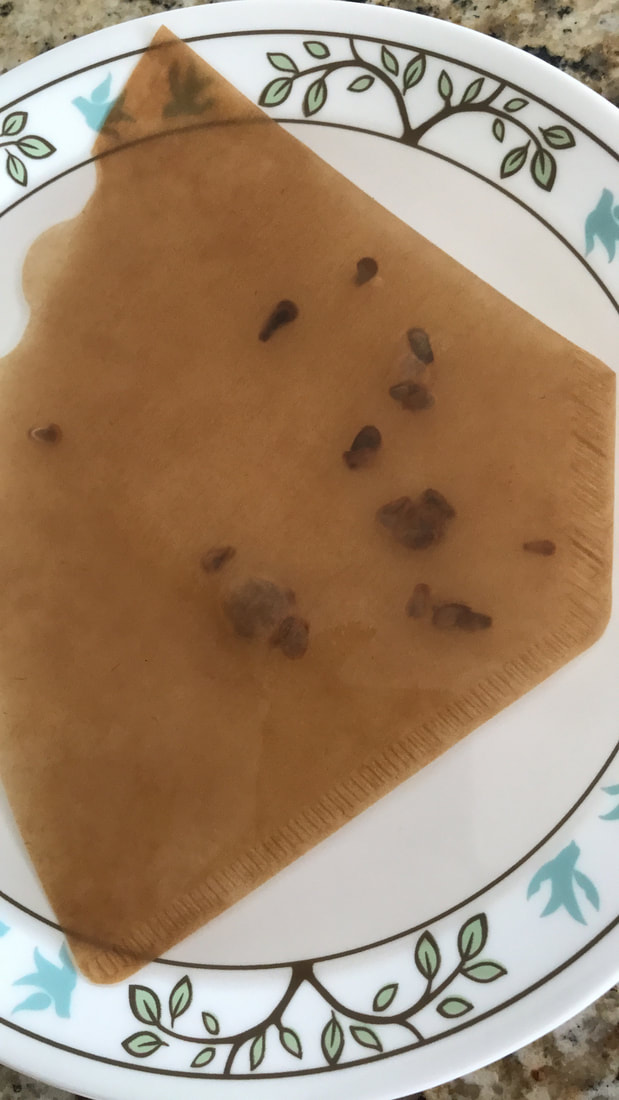 26 showy milkweed seeds |
Day Two
2/12/18 09:00 drained water off plate. Added fresh dechlorinated water. Placed plate on the heating mat. Water temp at 10:00 is 74°
2/13/18 01:00 drained water. Added water. 74°
2/13/18 01:00 drained water. Added water. 74°
Day Three2/13/18 13:00 drained water off plate. Two seeds are showing growth. Added water. Placed plate on heating mat. 2/14/18 01:00 drained water. Added fresh water. Placed plate with seeds on heating mat. At least six of twenty six seeds are growing. Water is 75° at 02:00 | 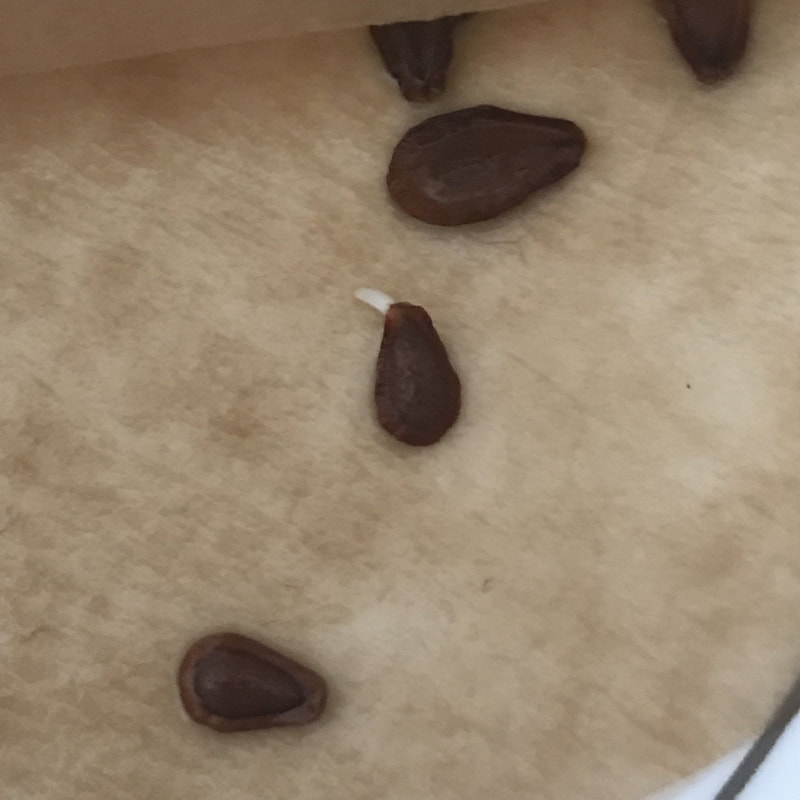 germination begins at day three |
Day Four
|
2/14/18 13:00 eight seeds are showing growth. Drained water. Added water. Back on heating mat. Water back to 75° at 14:00
2/15/18 00:00 drained and replaced the water. Placed plate on heating mat. |
Day Five2/15/18 10:00 Five days since test began. Exactly 50% of showy milkweed seeds have germinated. 13 growing 13 not growing. 2/15/18 10:30 clipped the tip of the 13 ungerminated seeds and placed them in a new coffee filter in dechlorinated water on a plate on a heating mat. A plastic dome was placed over everything and the temp is now 80°-85° 2/16/18 00:45 added water to plate. Dome created higher temp which evaporated most of the water. | 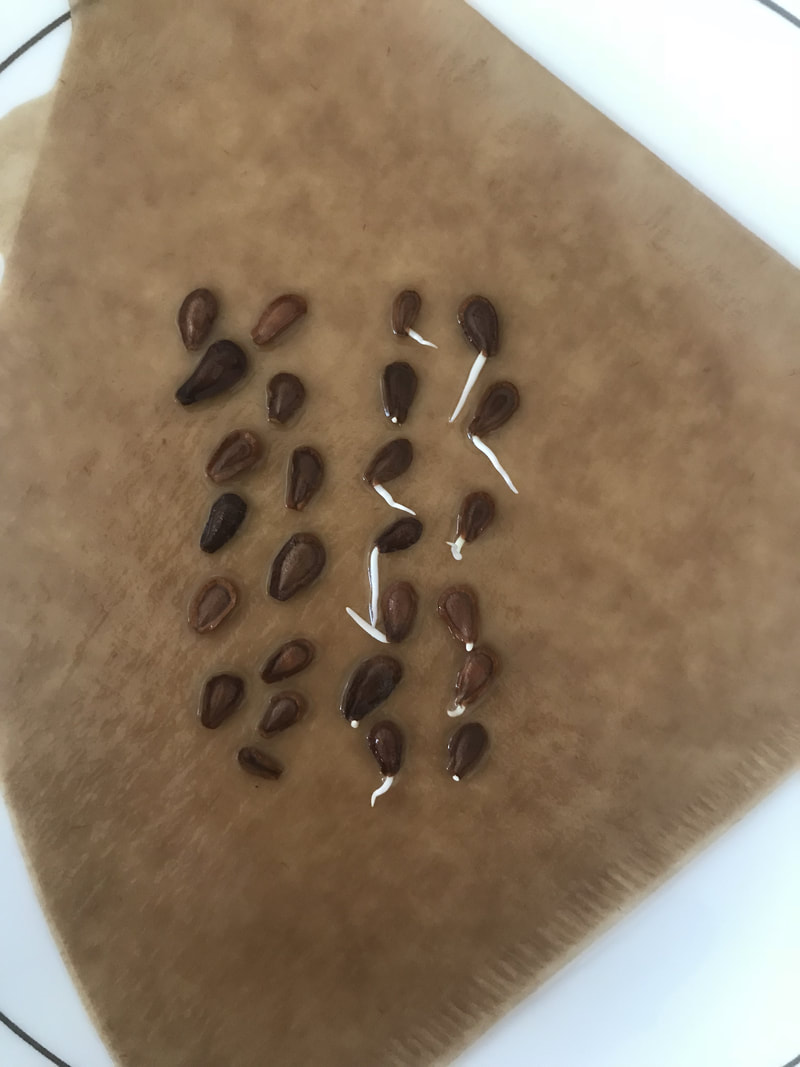 50% germination at day five |
Day Six
2/16/18 13:00 drained water. Added water. Placed plate on heat mat. Added dome over everything.
2/17/18 01:30 drained water. Added water. Placed plate on heat mat and covered with dome.
2/17/18 01:30 drained water. Added water. Placed plate on heat mat and covered with dome.
Day Seven2/17/18 07:00 test complete. 21 of 26 seeds are growing in only seven days. FindingsWithin 5 days 50% of the seeds germinated. Thats 13 of 26 seeds growing in five days. Clipping of the 13 ungerminated seeds was done at the end of 5 days. The 13 newly clipped seeds germinated at a rate of 62% after two additional days. That means 8 ofthe 13 slow to germinate seeds did end up growing after clipping occurred Total germination of the 26 seeds was 21 seeds or 80.7% |  80% germination at day seven |
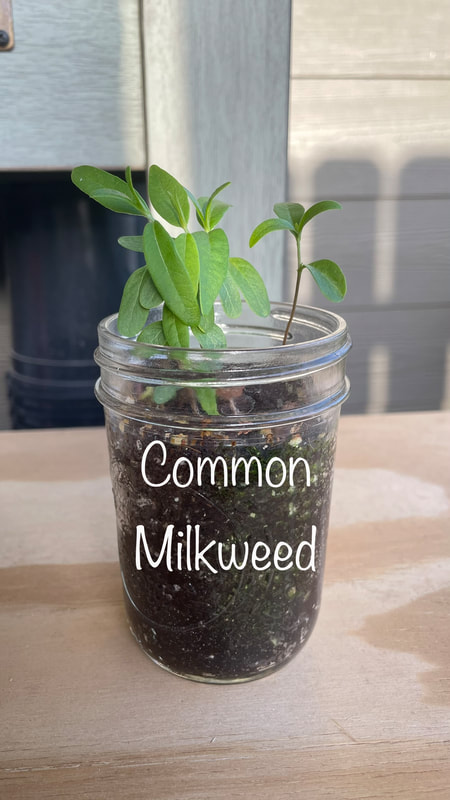
Water Germination of Common Milkweed Seeds
| Water germination of showy milkweed seeds worked very well. 80% of the showy milkweed seeds germinated in seven days. I am repeating the test with common milkweed seeds. When you ask the internet "how to grow common milkweed?" you will almost always be provided directions to Cold Moist Stratification of Milkweed Seeds. Does it work? Yes. Is there a faster way that works? Lets find out. | 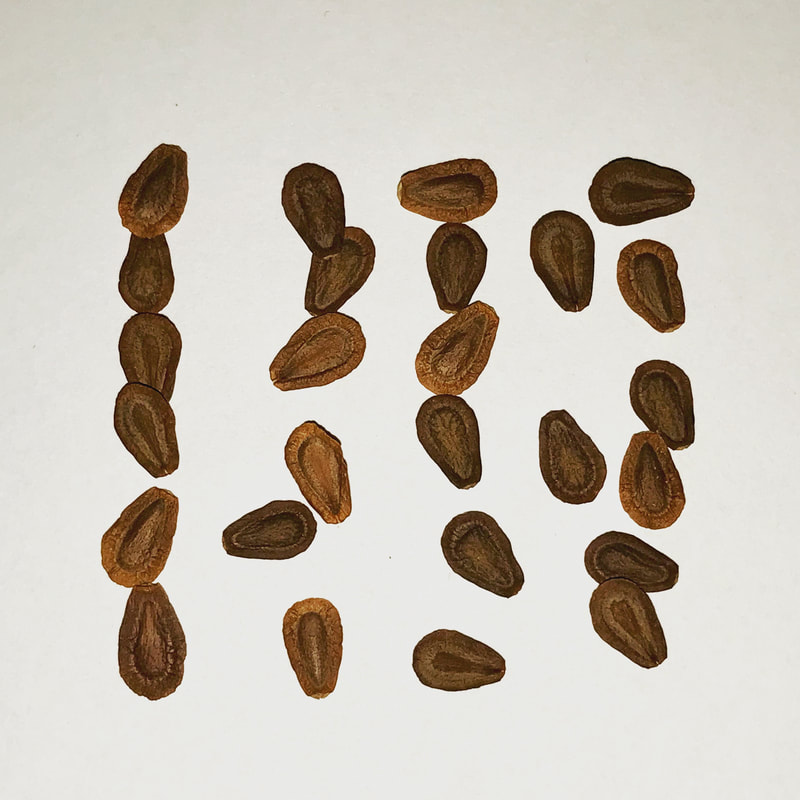 26 common milkweed seeds |
| Water Germination of Showy Milkweed Seeds worked and you can read about that at the beginning of this blog post. I'm in the process of testing the method using common milkweed seeds. The results will be updated as they become available. As you can see in this photo the common milkweed seeds are in a coffee filter. The coffee filter is placed on a lunch plate. Dechlorinated water is poured onto the plate so the seeds are fully submerged. The plate is placed on top of a seedling heat mat. A plastic bin is placed over everything. The temperature of the water is measured with an infrared thermometer. Current temperature is 80 degrees Fahrenheit Try to keep the seeds between 75 degrees and 85 degrees. Latest update 3/6/2018 | 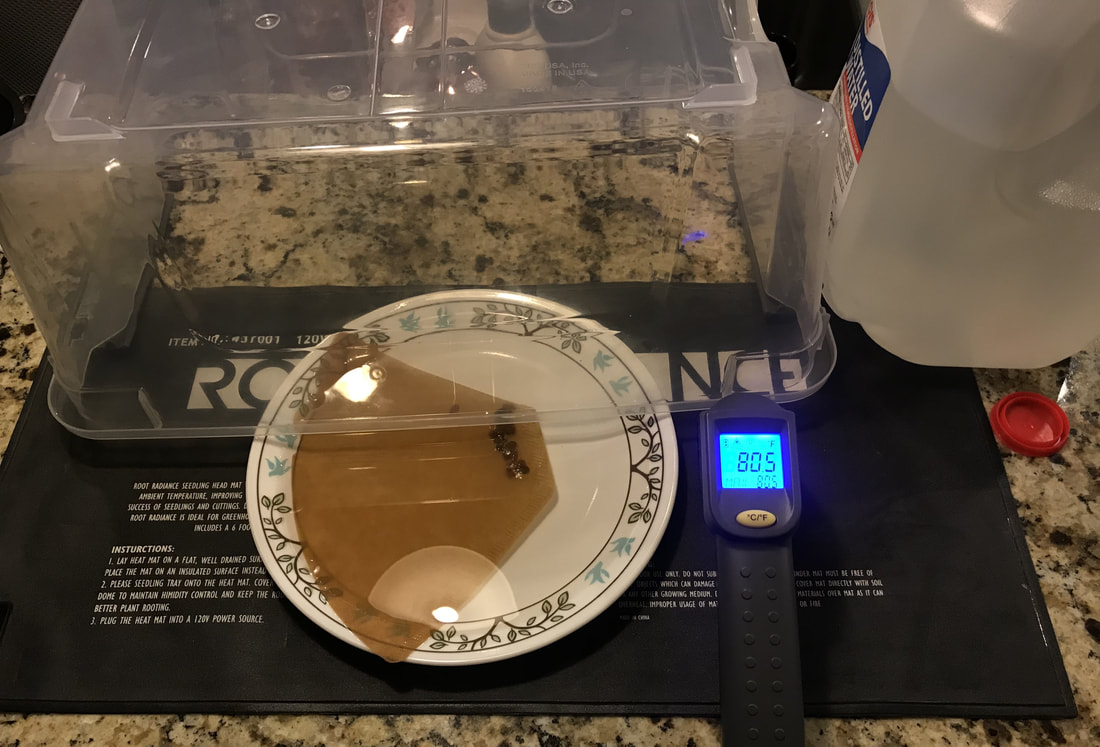 water germination of common milkweed seeds |
Day OneDay one requires an initial setup. Place the seedling warming mat on a table and plug it in. Set a plate on the seedling warming mat. Hopefully the day before this you have left water out for twenty four hours so it is now dechlorinated water. Pour the water into the plate. Place the milkweed seeds in the coffee filter. Set the coffee filter on the plate so the seeds are completely submerged in water. Water temperature should be 75 to 85 degrees. | Day One Video |
Day TwoClipping the milkweed seed will speed up water germination. The seeds can be clipped before going in the water but I like to wait twelve to thirty six hours before clipping the seeds. Letting them absorb some water in the first day makes them softer and easier to clip. | Day Two Video |
Day Three
Water change twice per day. Two of the twenty six seeds have root beginning to show from the seed.
Day FourAt day four there were ten seeds beginning to grow. Sixteen seeds are not showing any signs of germination. At this point I was still expecting more of the seeds to grow over the next few days. That did not occur. All the growth began in fewer then five days. The best thing to do with the common milkweed seeds that are not growing is to place them into cold moist stratification. |  |
Findings
The test continued to day seven. The length of the seeds roots increased but the ungerminated seeds did not germinate. The method is effective in germinating common milkweed seeds. Only some of the viable seeds seem ready to grow. I would like to guess then cold moist stratification prior to water germination could increase the germination rates of the common milkweed seed.
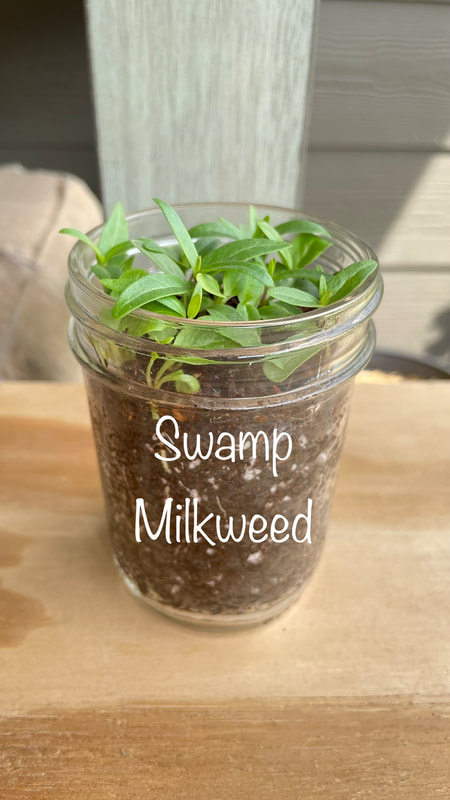
Water Germination of Whorled Milkweed Seeds
The whorled milkweed seeds I am working with this week have a verified germination rate of 93%. The goal is to start these seeds growing in less then a week. The test began with thirty whorled milkweed seeds.
Day One Thru Three | 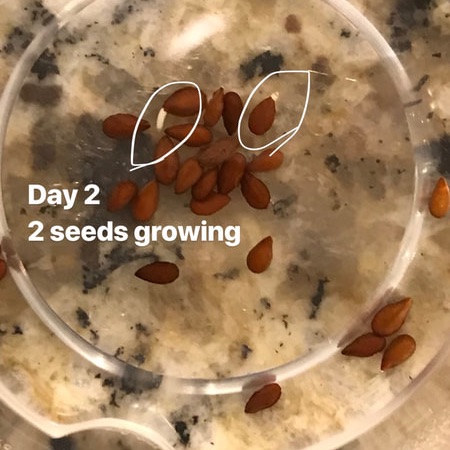 |
Day FourContinue to drain and replenish the water twice per day. At day four there are a total of six seeds germinating in the bottom of the cup. The cup has always been siting on top of the *seedling warming mat. Testing of whorled milkweed continued until seven days elapsed. | 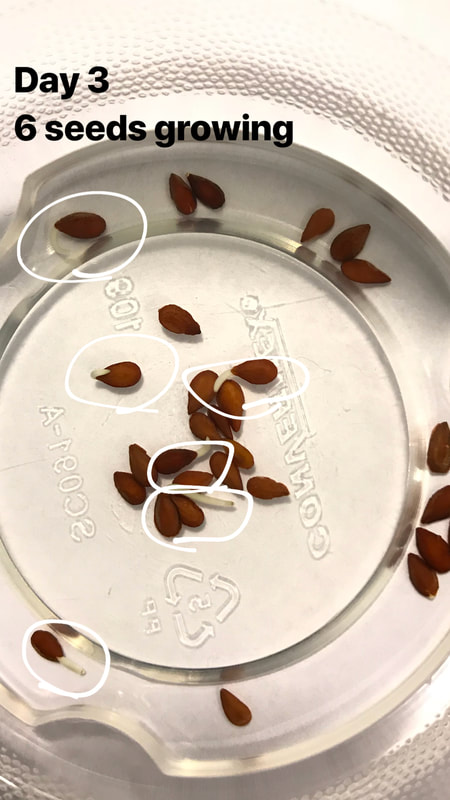 |
FindingsAt day seven the seeds were removed from the cup of water, untangled, and counted. The results were extremely rewarding. Seventeen seeds are growing and thirteen seeds did not grow. The germination rate is 56% in only seven days. While the germination rate did not reach the ideal number of 93% the results are considered successful. In addition to the number of seeds that germinated I was very surprised to see how long the roots had grown and how vigorous the seedlings appeared to be. When the outdoor weather becomes suitable for growing I will plan to water germinate many more whorled milkweed seeds. | 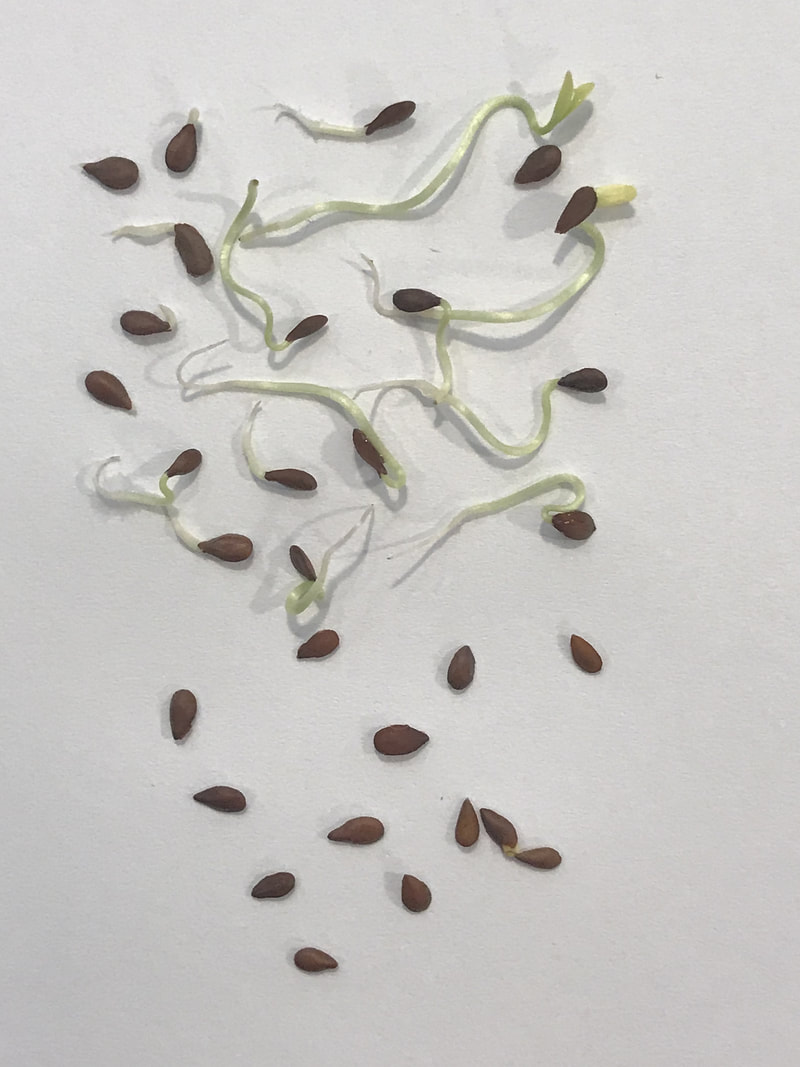 |
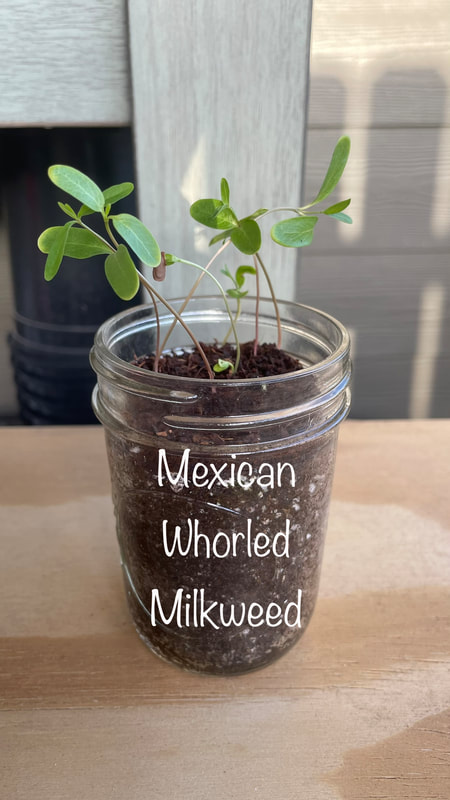
Water Germination of Mexican Whorled Milkweed seeds
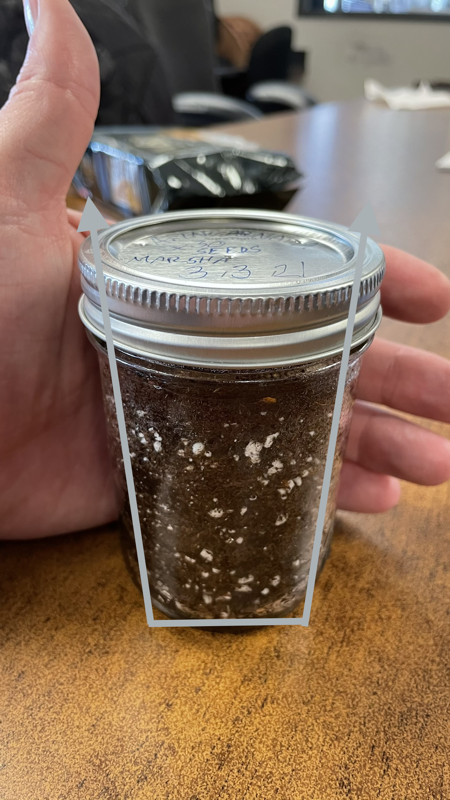
This test began with thirty mexican whorled milkweed seeds. The seeds were placed in a cup and water is added to one centimeter in depth. Twice each day the water was drained and replenished. At day two there was one seed growing and twenty nine were not. At four days there were seven seeds growing and twenty three were not. The test continued for a total of six days.
Findings
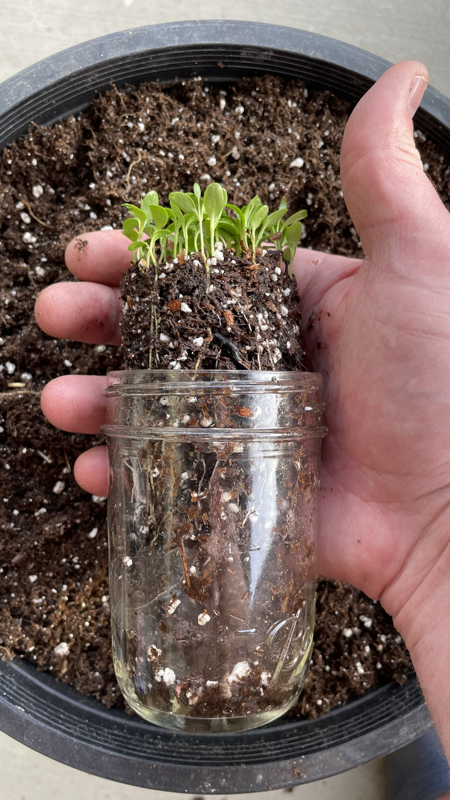
At the end of day six there were seven seeds germinated. The test concluded. The germination rate in water of the initial thirty seeds was 23%. Seven seeds grew and twenty three seeds did not germinate. The seeds that did sprout grew very long and healthy looking roots. I decided to plant the roots in a bit of soil. The outdoor temperature is not conducive to growing milkweed seedlings in March. I have placed the plants in soil in a red solo cup with drainage holes. They remain on the seedling warming mat on my kitchen counter. I'll try to provide an update as far as if they survive or die. I'm not very optimistic because I continue to have problems growing mexican whorled milkweed despite how well it seems to grow all around me.
Water Germination of Milkweed tree seeds
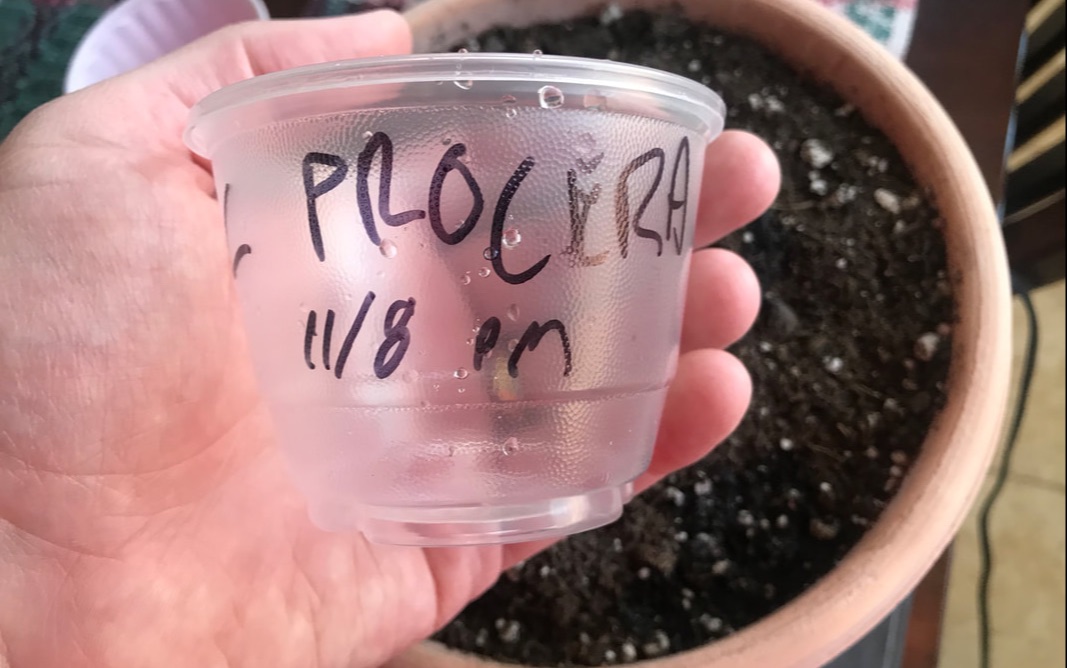
These are new seeds for Brad Grimm dba Grow Milkweed Plants in 2018. I traveled to the Rio Grande Valley to see the plant that produced these seeds. Oleander Seth at Oleander Acres was kind enough to sell me a few of these wonderful seeds. One of the first seed packets was sent to a customer who had wonderful results using water germination for her first time. Seeing the customers fantastic results I decided to sprout seeds myself. This test began on November 8, 2018 with only three Calotropis procera seeds. The seeds were placed in a clear plastic cup and water was added to one centimeter in depth. Twice each day, at twelve hour intervals, the water was drained and replenished. I added warm to hot tap water. At one and a half days (36 hours) there was two seeds with root radicals beginning to show. (see photo below)
two root radicals after 36 hours
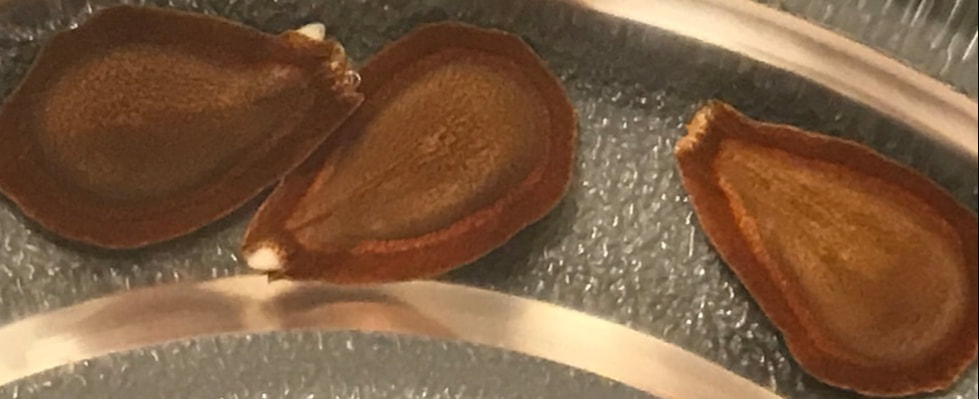
Okay, so that was fast! Following the water germination method is working well. The seeds continue to get fresh warm tap water and remain on the seedling warming mat. At day two (48 hours) the two seeds have longer root radicals. (see photo below)
growth from Calotropis procera after 48 hours
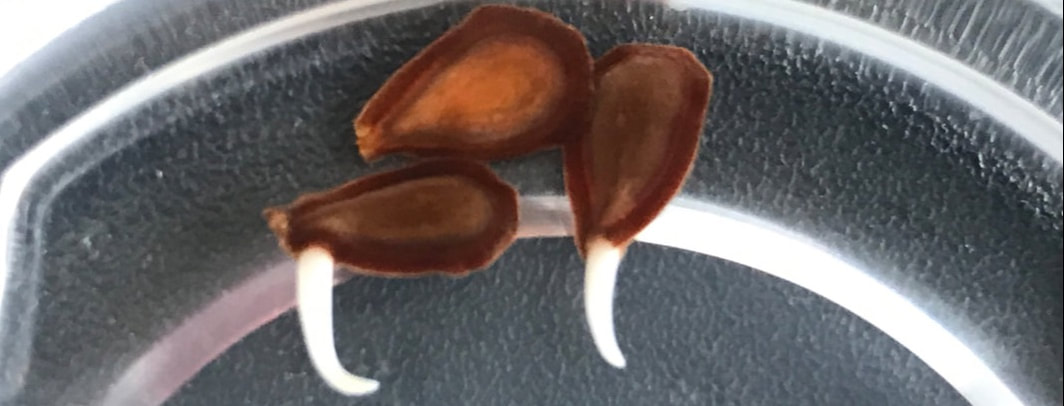
Obviously it would be nice to seed all three seeds sprout. It just takes a little more time. At just under three days (70 hours) all three seeds have sprouted. This is when the fun begins.
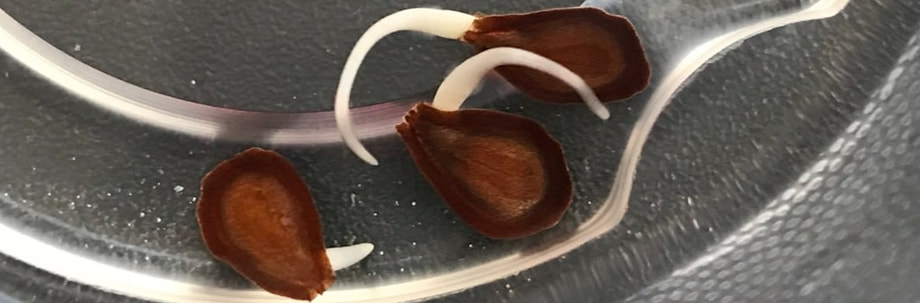
These Milkweed tree seeds have made me feel like a real green thumb gardener. I should say that sprouting seeds in November isn't the best time of year because the sun is low in the sky and the outdoor temperature frequently drops below freezing here in northern Nevada. The Milkweed tree is a tropical and sub tropical plant so it will never live year round in its current location. Fortunately it can be grown in containers and that is the next step.
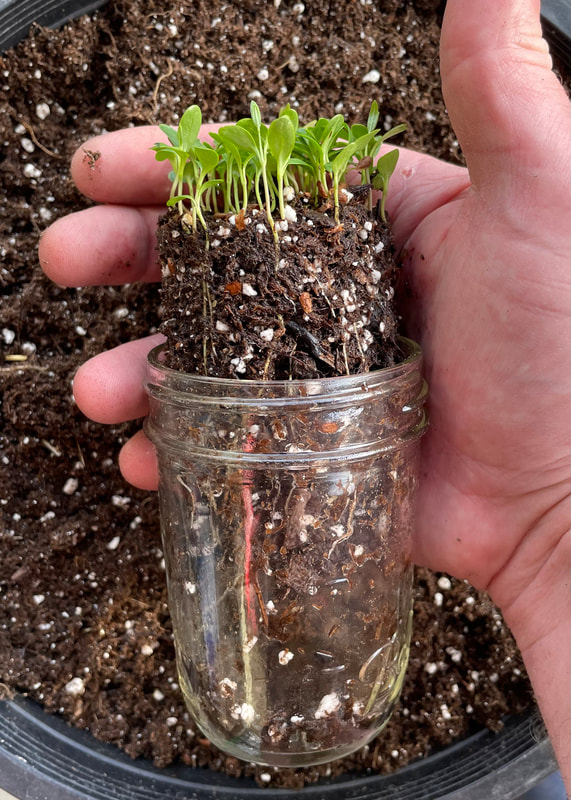
A wonderful advantage of starting seeds by water germination is how easy it it to plant the seeds. All I did was clean a container that previously has annual flowers that had perished in the recent freezes. I added a soilless base in the container to assist in facilitating the capillary action to wick water from the built in saucer. In the bottom of the planter I used a Coco Coir Brick. Then I added FoxFarm Strawberry Fields Potting Soil.
 planting seeds on day 3 |
Here is the great part. Planting is as easy as dumping the seeds right from the cup into the soil. All I did now was pour out the seeds and water onto the surface of the soil. I was careful to move the cup while pouring. I wanted the seeds to have separation. A simple circular motion was all that it took. One of the seeds didn't immediately pour out so I added more water to the cup and poured the last seed onto the soil a few inches away from the other two seeds. I've been keeping the planter on the seed warming mat and adding water to the planters saucer.
Today is day nine since the seeds started. Seeds have been in the soil for six days. All three seeds were only lightly settled in the soil. They have now pushed their way above the soil. Based on my germination combined with Jessalyn's germination results. The seeds are at 96% germination.
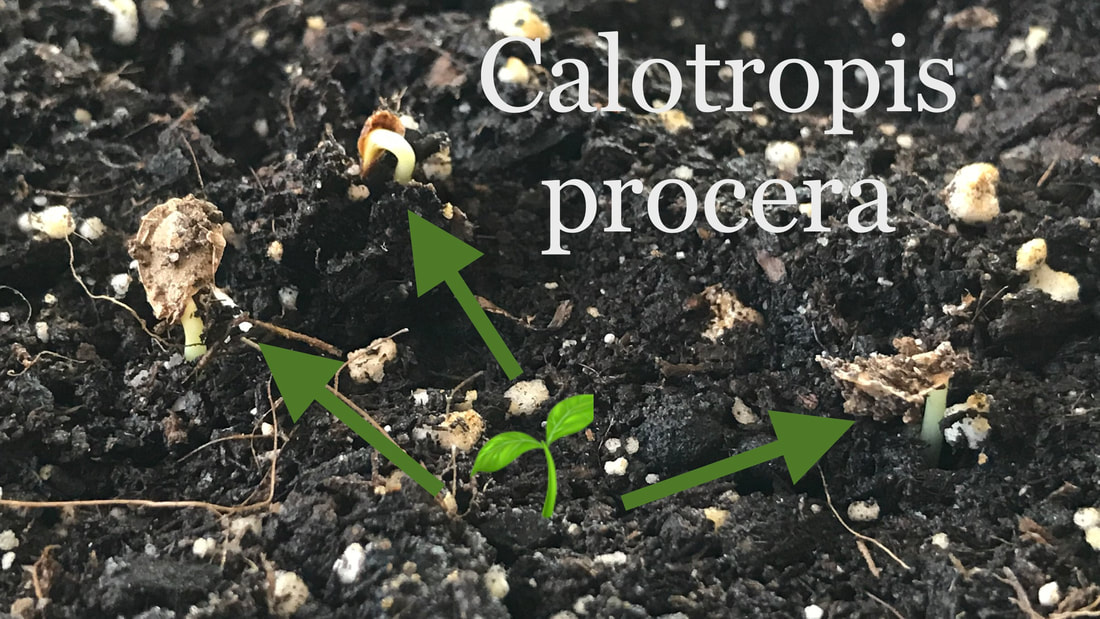 growth at day 9 |
These Milkweed tree seeds are available for sale. The seeds are from the Milkweed tree grown at The Butterfly Garden at Oleander Acres RV Resort. To hear about my visit to the Rio Grande Valley you can listen to the podcast episode titled Milkweed Butterflies of the Rio Grande Valley.
Water Germination of Butterfly Weed Seeds
Day One
Thirty butterfly weed seeds placed in a cup of shallow water. Placed cup on seedling warming mat. Water changed with fresh water after twelve hours.
Day Two
Water changed with fresh water twice on day two.
Day Three
Water changed with fresh water twice on day three.
Day Four
Water changed with fresh water twice on day three.
Durring the second water change twenty seven of the thirty seeds were growing.
Durring the second water change twenty seven of the thirty seeds were growing.
Day Five
At the beginning of day five all thirty seeds were growing. 100% germination of thirty seeds in five days.
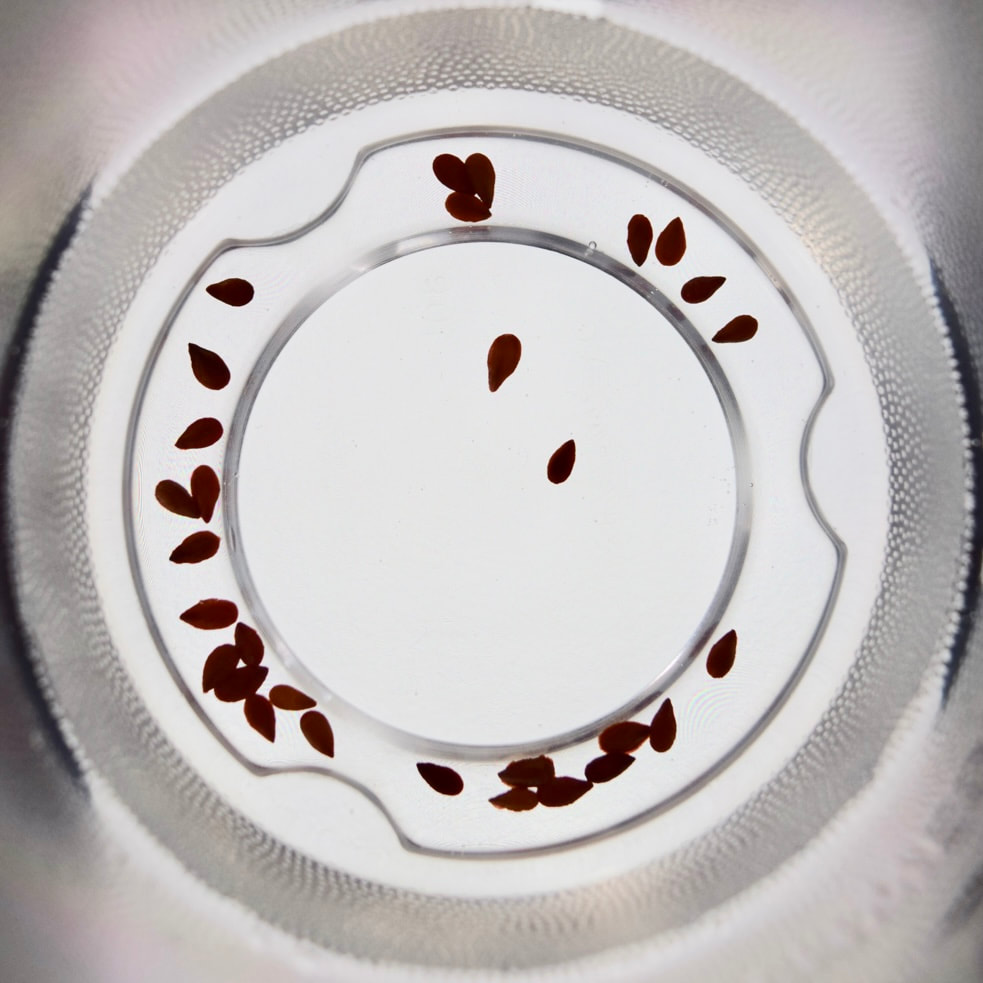
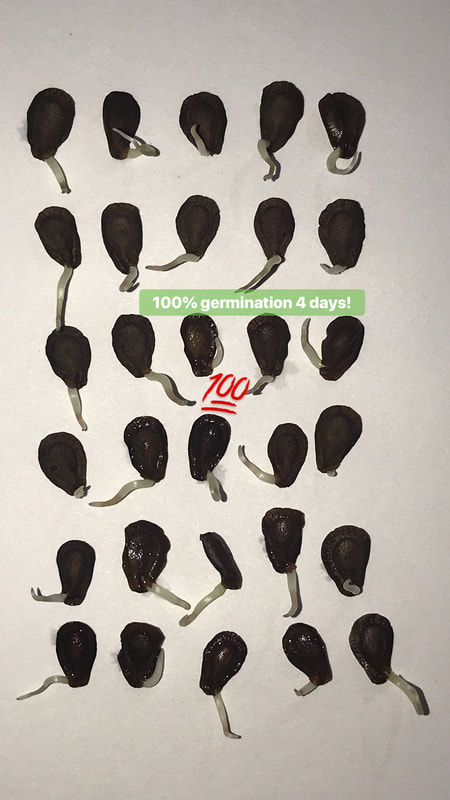 Butterfly weed seeds | 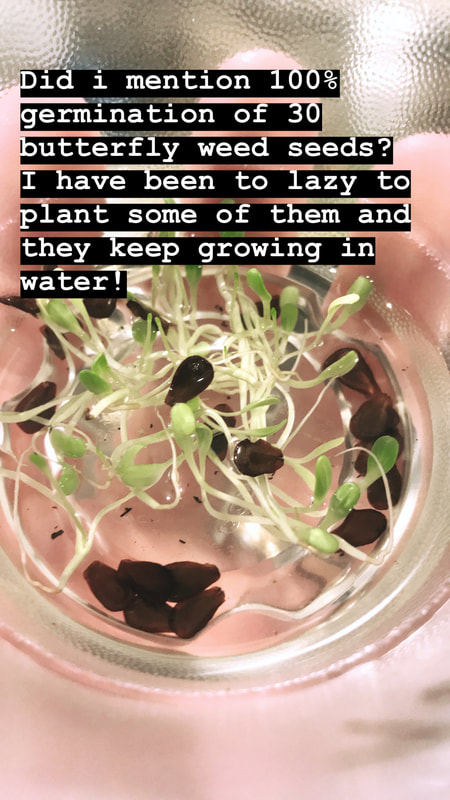 Butterfly weed seeds |
Findings
WOW! Water germination of butterfly weed worked great. I've never seen 100% germination before. Results are not typical. These seeds in the test are no longer available but they were great while they lasted. Plants from these seeds are growing in my garden. When they produce seeds I'll make them available on this site.
Water Germination of Sand MilkWeed Seeds
Day One through Day Five
Thirty Sand milkweed seeds placed in a cup of shallow water. Placed cup on seedling warming mat. Water changed with fresh water after twelve hours. Water changed every twelve hours for five days. At the beginning of the fifth day six seed were growing.
Day Six Through Day Eight
Water changed with fresh water every twelve hours. On the beginning of day eight ten seeds were growing. The ten growing seeds were planted.
Day Nine Through Day Eleven
Water changed with fresh water every twelve hours. The water germination test concluded on day eleven. Eleven seeds grew.
Findings
Eleven of thirty sand milkweed seeds grew. The germination rate is 36%. The seeds were from Prairie Moon Nursery and they told me the germination rate of these seeds was 25%. Therefore water germination of sand milkweed appears to work better then whatever method was used in their germination test.
Sand milkweed 20 seeds, Asclepias arenaria (half are clipped)
Water Germination of Heartleaf MilkWeed Seeds
Day One Through Day Nine
| Thirty Heartleaf milkweed seeds placed in a cup of shallow water. Placed cup on seedling warming mat. Water changed with fresh water after twelve hours. Water changed every twelve hours for nine days. On day five i scraped the tip of five seeds with a sharp knife to remove part of the seeds exterior near where the root radical grows from. On day nine I clipped the tip of the other twenty five seeds with tweezers. | 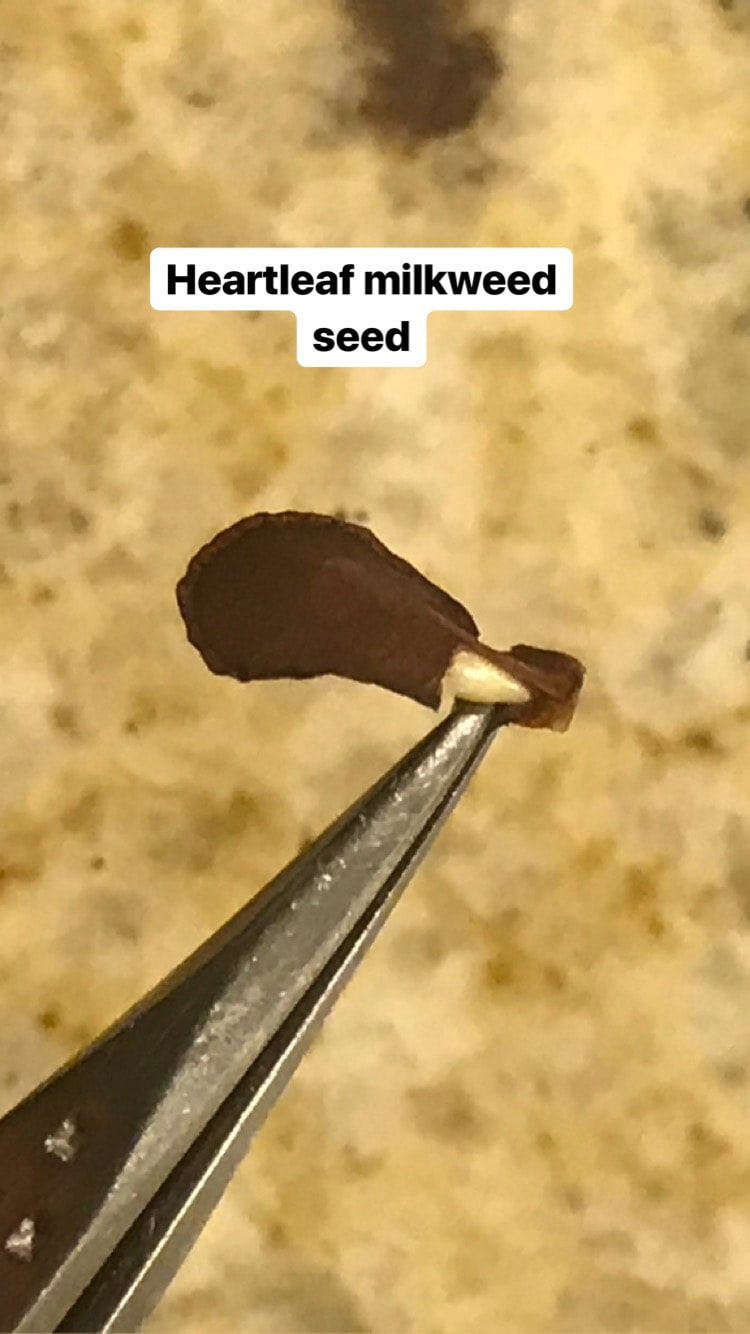 Heartleaf milkweed seed |
Water Germination of Desert Milkweed Seeds
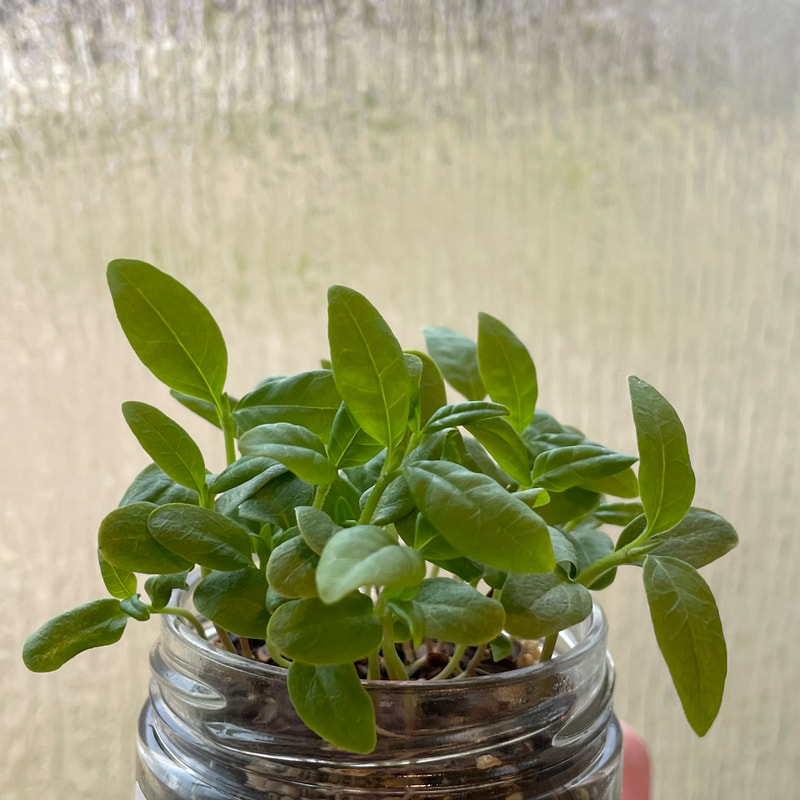
| Highly successful! Water germination of these desert milkweed seeds was very quick and easy. The seeds began sprouting on the second day and all fourteen of the seeds that grew were growing by day three. One seeds didn't grow at all. The sample size was small only fifteen seeds. Overall I got 93% germination. After getting sprouts in three days I continued the water germination process thru day five. On the fifth day I planted the seeds in soil. I made a video of the process. Be sure to Subscribe, Like and Share the video. | 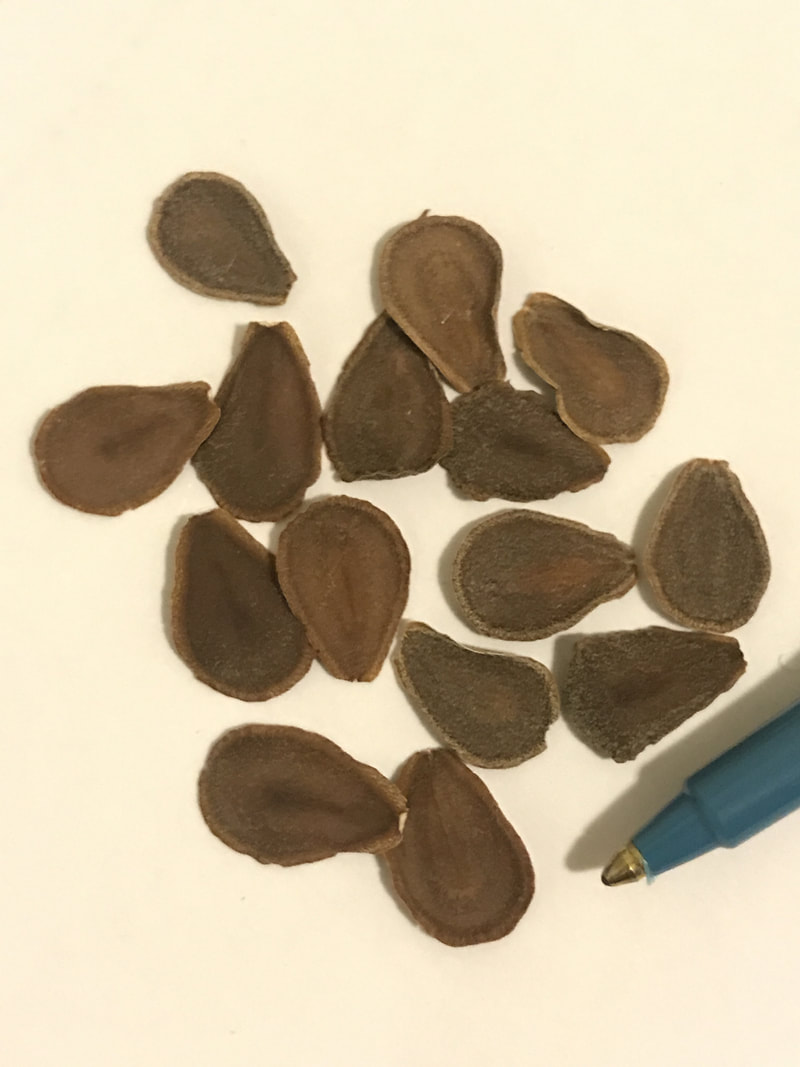 Desert milkweed seeds July 2018 |
| |  Desert milkweed plants August 2018 |
Pro tip. Asclepias erosa grows a massive taproot when mature. This allows it to be a great plant thru the dry hot summers in the southwest. Be aware that the small root is very brittle and a great deal of care needs to be taken while handling and planting the seedling. A broken root can kill the fragile plant.
Desert milkweed seed packet, Asclepias erosa 29 seeds

Cold Moist Stratification of Milkweed Seeds
By Brad Grimm at Grow Milkweed Plants
Cold Moist Stratification (CMS) describes the process that seeds naturally progress through. Timing of the process occurs naturally when the seed is dispersed from the milkweed plant in the fall and continues until the seed begins to grow in the spring. The process I am presenting for CMS is designed to simulate winter conditions and can be applied to the milkweed seed at any time of the year in your home.
| | Winter sowing milkweed seeds is the natural way to break their dormancy. The cycle of freeze and thaw mixed with occasional rain or snow does two things. First, the seeds coat is physically scraped by movement over the dirt. Second, the inner biology is adjusted because the seed has been imbibing water over the winter. Once the warm days arrive in late spring seed is prepared for grow. |
Planting milkweed seed between Thanksgiving and Christmas is my favorite. It's nice to get the seeds in the dirt before the snow arrives. Casting milkweed seed over the snow leaves them exposed to become the food for small animals.
Materials needed:
|  prepare the work space |
Process:
|
Download the Cold Moist Stratification .PDF file so you will have it ready when you begin growing milkweed seeds.
| Guide to Cold Moist Stratification .PDF |
Repeat success indicates that the process works!
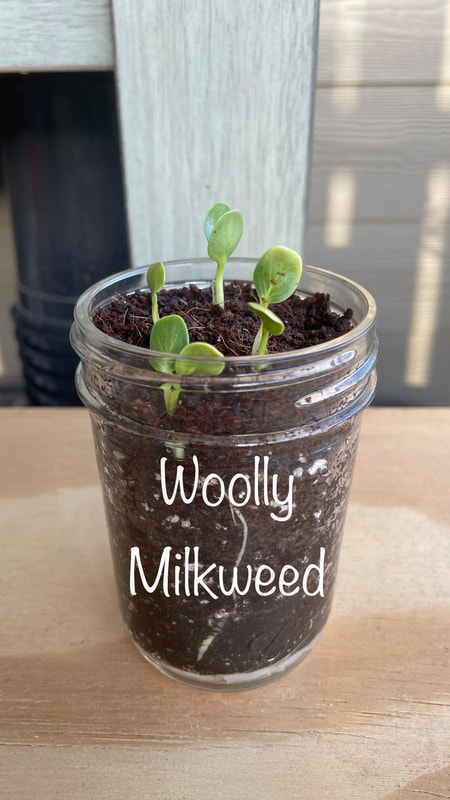
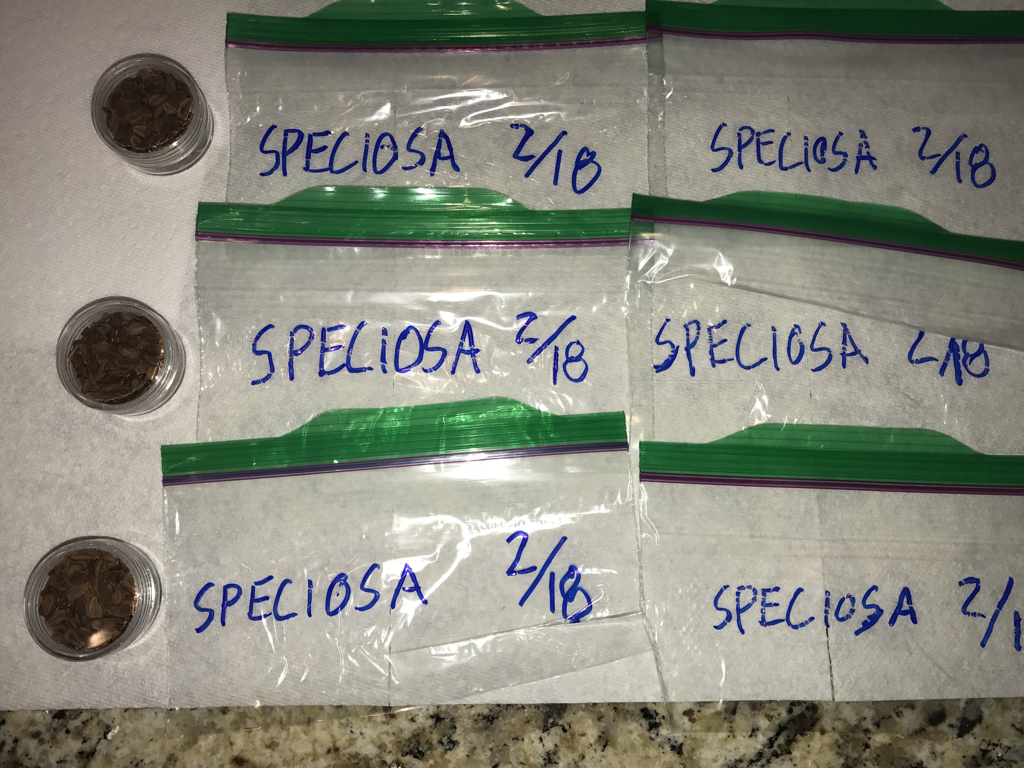
CMS with showy milkweed seedsOn 2/18/17 I prepared seven baggies with showy milkweed seeds. Pictured is midway thru the process. On the left I am in step 7. Dormant seeds are spread on the moist paper towel.  showy milkweed seeds | CMS with woollypod milkweed seedsIn May 2017 I purchased woollypod milkweed seeds on ebay and began the process of CMS to prepare them to grow. These seeds are really big! The seeds were collected in the fall of 2016 and began dormant. 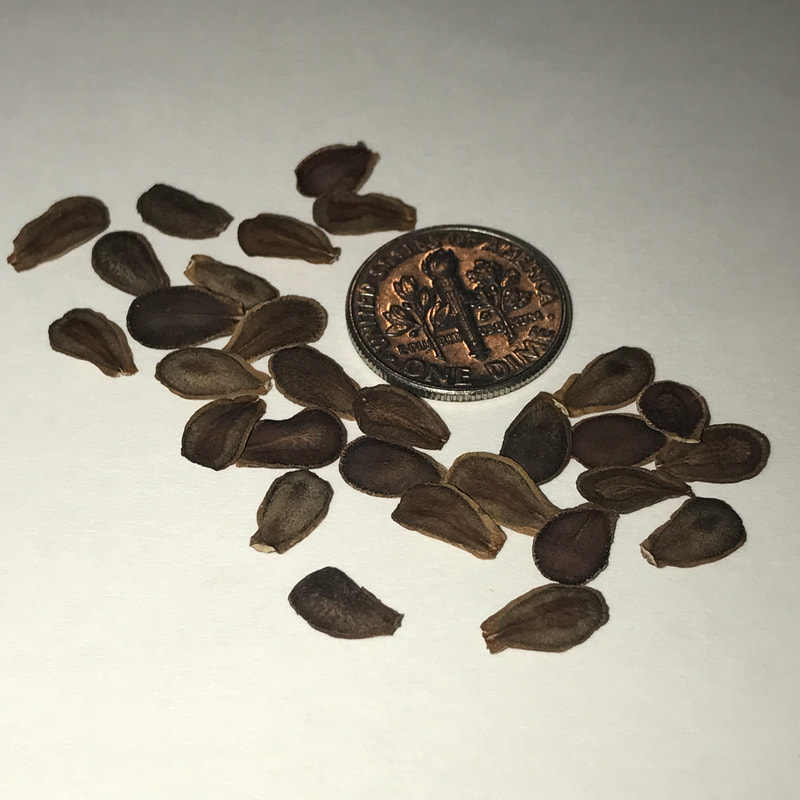 woollypod milkweed seeds |
| At step 9 the seeds are prepared to go into the refrigerator for 40 to 60 days. 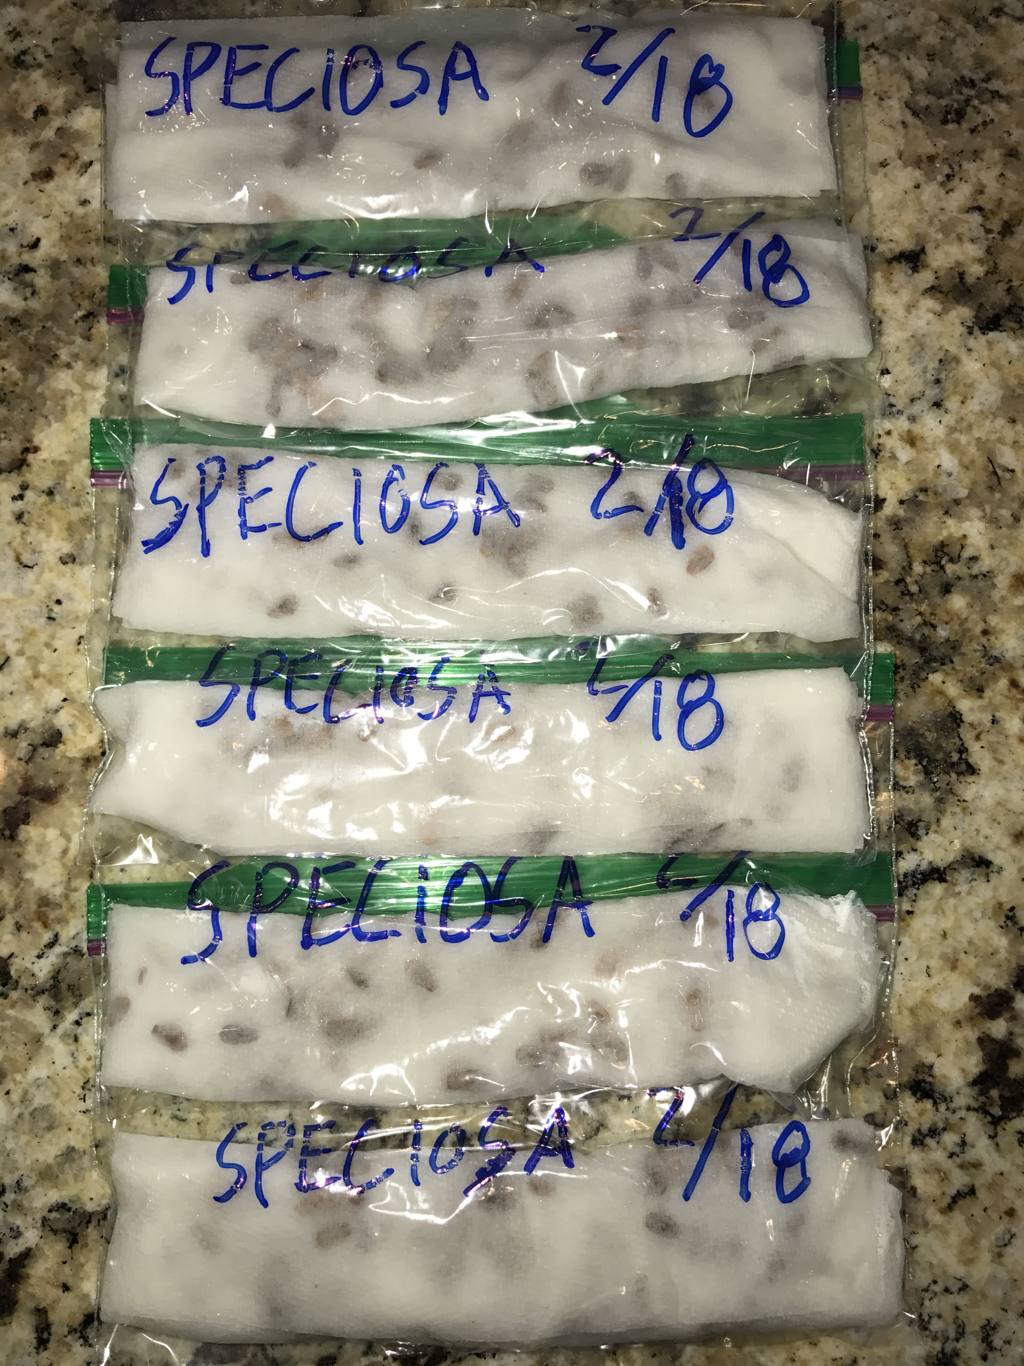 | Step 14 was hard to wait for. It's not much to look at right now. Exciting biological changes have actually been occurring inside the seed over the last 40 days. 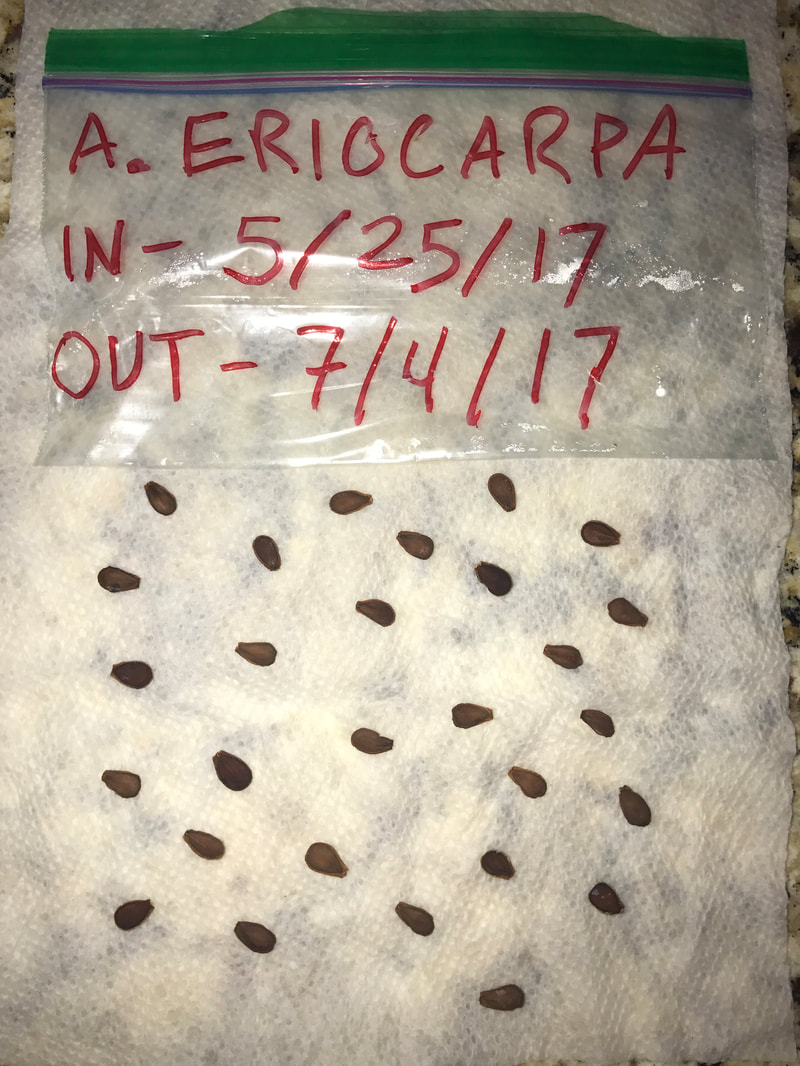 |
| Step 12 looks easy. Waiting can be the hardest part. Give the seeds 40 to 60 days in the refrigerator. My fridge has a temperature display on the door. Looks like the seeds are about 37 degrees. 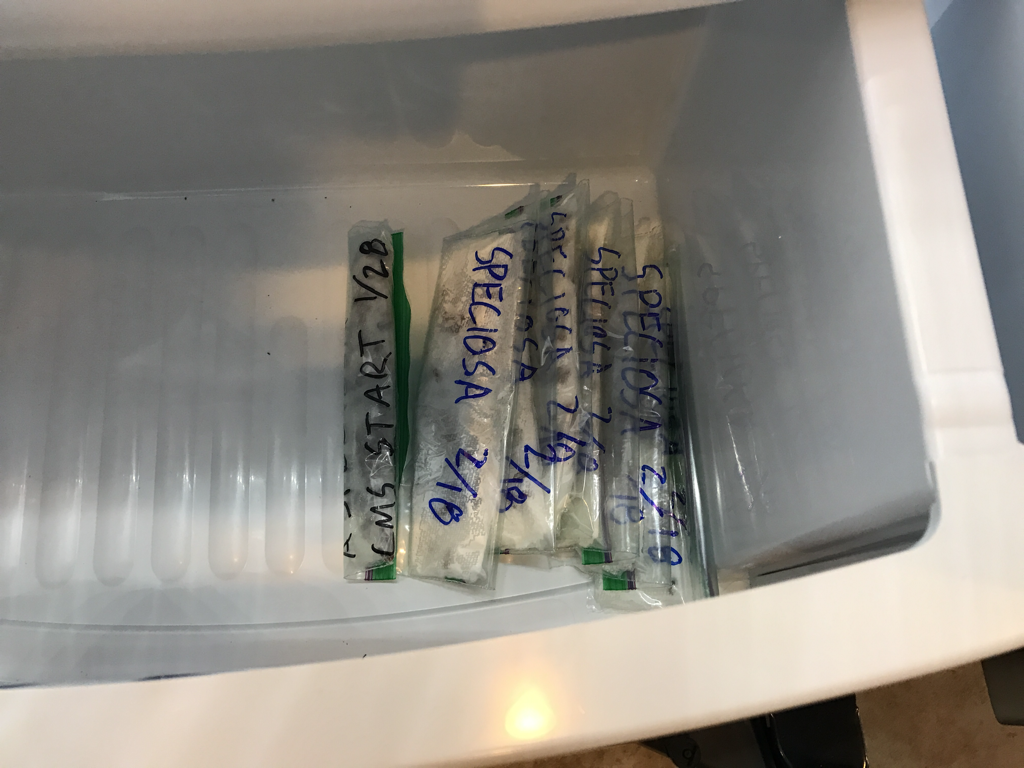 | Step 15 is pretty cool to see. The seeds are growing right inside the baggie! Time to take the seedlings out of the paper towel and get them in the ground. Some of the seeds root is piercing thru the paper towel. Just pull the towel apart and be careful not to harm the seeds root. 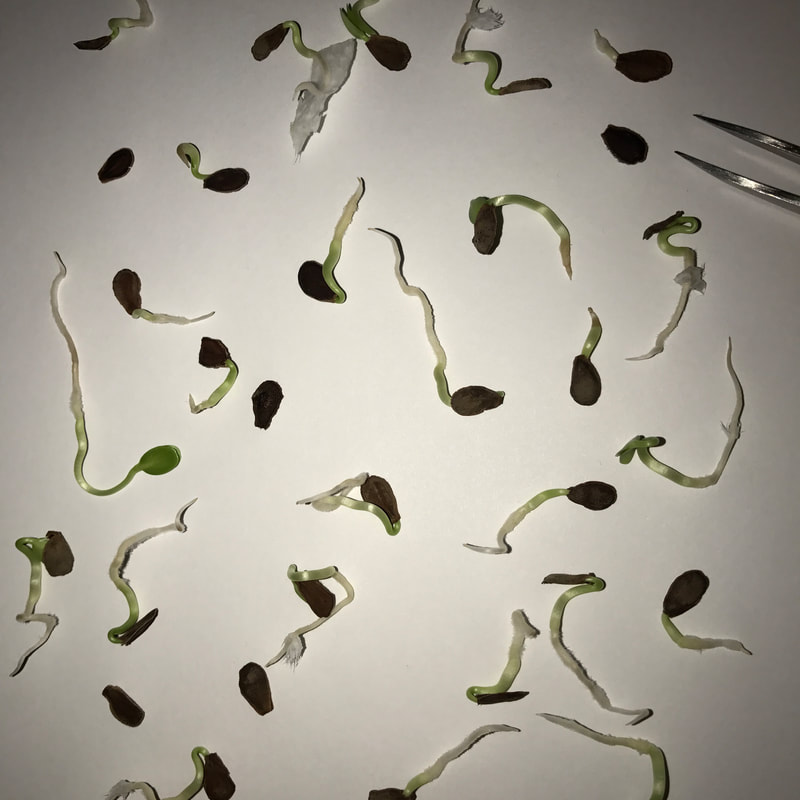 |
 |  |
Update
Since February for the showy milkweed and May for the woollypod milkweed was to late in the year to winter sow I used the method described above. All and all it worked out great! By August the woollypod milkweed plants were beginning to look like real milkweed.

woollypod milkweed plants August 22, 2017
As summer became fall the temperatures outside began to cool off. The sun set a bit lower in the sky and the woollypod milkweed went dormant along with all the other plants. It's December 2017 now and the woollypod milkweed is completely dormant. I have been storing them in the garage for the winter. Hopefully in March of 2018 I will be bring them out to enjoy the warmer weather.
Site Search
Author
Make milkweed your friend. Your friends will love your milkweed. My name is Brad. Learn more about me now.
Brad Grimm
Blog Archives
March 2022
November 2019
March 2018
August 2017
March 2017
April 2016
February 2016
July 2015
June 2015
March 2015
January 2015
November 2014
September 2014
August 2014
July 2014
Blog Categories
All
Caterpillars
Chrysalis
Growing Milkweed
Milkweed
Monarchs